

SLA is the process people reach for when a prototype has small features, fine text or a surface that has to look finished. The same process that produces that detail also produces support marks and a part that needs cleaning and curing, so the useful conversation happens before the file is uploaded rather than after the build.
What SLA is genuinely good at
Resin printing builds a part by curing liquid photopolymer layer by layer with a light source, which is why it resolves small features and smooth surfaces that filament processes struggle with. Fine wall detail, small internal channels, legible text and a surface that sands and polishes cleanly all come naturally. It is also the process that most easily produces transparent or translucent parts, because the layer lines can be polished out.
| Requirement | SLA suitability | Note |
|---|---|---|
| Fine features and small text | Strong | Layer resolution favours detail in the build plane |
| Smooth, paintable surface | Strong | Support marks need sanding on visible faces |
| Transparent or clear parts | Strong | Clarity depends on post-processing, not just resin |
| Functional snap fits | Depends on resin | Standard resin is brittle; engineering resins behave better |
| Large simple panels | Weak | Other processes are faster and cheaper at that scale |

Where support marks come from, and how to plan around them
A resin part is built on a platform and held by supports that are removed after curing, which leaves small witness marks where they attached. Those marks are unavoidable, and the design decision is where they land. Orienting the part so supports meet a hidden face, a mating surface that will be machined anyway, or a face that will be sanded, keeps the visible surface clean.
Orientation also affects accuracy. A part built flat on the platform can distort as the first layers cure, while a part standing on supports is more stable but needs more of them. Where a prototype has one critical face, telling the supplier which face it is allows the build orientation to be chosen around it rather than around build speed.
What is an SLA model, in practical terms
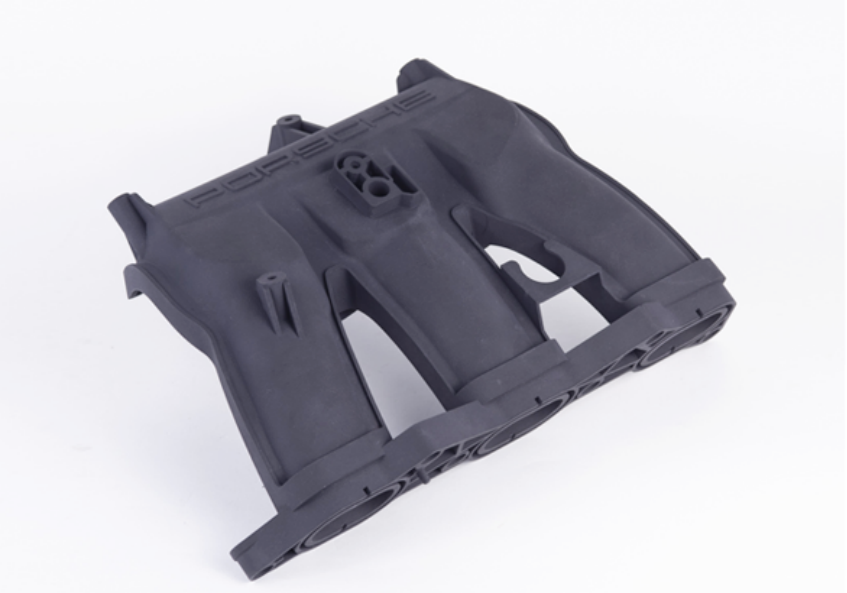
A resin part built layer by layer from a photopolymer.
Unlike a machined prototype, an SLA model has no cutter marks and no fixturing, so it can carry geometry that would be difficult or impossible to machine: internal channels, lattice structures and organic shapes. Unlike a filament print, it has a smooth surface and finer feature resolution. What it does not have is the mechanical behaviour of the production material, which is the limitation that matters most when the prototype is destined for testing rather than demonstration.
That distinction should drive the resin choice. A standard resin gives good appearance and detail; a tougher engineering resin tolerates handling, snap fits and threads; a high-temperature resin survives a thermal test that standard resin would not. Selecting the resin for the test the prototype has to pass is more useful than selecting it for the lowest price.
Design rules that prevent a failed build
Three constraints matter at the design stage. Minimum wall thickness should be generous enough that the part survives cleaning and support removal, because very thin sections tear. Small holes and channels should be sized so uncured resin can drain, since trapped liquid will cure later and distort the part. And sharp internal corners should carry a small radius, which also helps the part resist cracking when it is handled.
Clearance is the other common issue on functional prototypes. An SLA part that has to fit another component needs clearance sized for the process rather than for the drawing, because a resin print tends to build slightly oversize on external features. Where a prototype is meant to prove an assembly fit, it is worth testing the fit on a cheap sample before committing to a full set of parts. Process terminology is standardised through ASTM Committee F42 on additive manufacturing, and application guidance is published by ASME and by UL Solutions for parts that need qualification.
Post-processing, and what it changes
Every SLA part goes through cleaning to remove uncured resin, support removal, and a final cure. Beyond that, sanding and polishing change appearance and, on clear parts, transparency. Those steps have limits: heavy sanding on a thin feature can remove it, and polishing a part with fine internal detail rounds the detail off.
Two practical points are worth setting out in the order. Name the faces that must not be sanded, and state whether the part is a visual model or a fit model, because the two need different post-processing effort. Where the part will be painted, a light sanding also improves adhesion, which makes the finishing step part of the part’s function rather than a cosmetic extra. Material data is published by ASM International, surface and coating terminology follows ASTM Committee B08, manufacturing practice is described by the NIST Manufacturing Extension Partnership, and resin handling obligations are covered by US EPA rules. Compare the process against alternatives on the MJF and 3D printing materials pages.
Quality checks on a delivered resin part
Inspection on a resin prototype focuses on different things from a machined part. The first check is dimensional on the features that matter for fit, measured after the part has been fully cured, because resin continues to change slightly after printing. The second is visual: support marks on faces that were supposed to be clean, incomplete cure showing as tacky surfaces, and distortion on large flat areas. The third is functional, and it is the one that determines whether the prototype did its job.
For repeat builds, it is worth agreeing what may vary between them. Resin batches, build orientation and post-processing all affect the result, so a part that measured correctly once is not automatically reproducible. Stating which dimensions and which surfaces must repeat makes the second order predictable.
Send the model with the faces to protect and the test the prototype must pass, and request an SLA prototype quote with a review of orientation and supports.
FAQ
What is an SLA model?
It is a prototype built by curing liquid photopolymer layer by layer with a light source. The process resolves fine features and produces a smooth surface, but the part behaves like a resin rather than like the material the production part will use.
How much does a 3D print service cost?
Cost depends on the build volume the part occupies, the resin chosen, the supports needed and the post-processing. Because parts are usually built together in one run, a small part shares a build with others, which is why quoting is based on the file rather than on weight.
When does SLA beat FDM for a prototype?
When detail, surface quality or transparency matter more than mechanical toughness and cost. SLA resolves small features and finishes smoothly, while FDM is cheaper and tougher for large, simple parts where appearance is not the requirement.