

Resin printing is usually chosen for a detail problem rather than a material problem. A part has thin walls, fine text, small channels or a surface that must look finished, and filament printing cannot hold it. The decisions that then matter are orientation, wall thickness and how the part will be cleaned, not the resin brand.
What level of detail resin actually holds
The process cures a liquid photopolymer layer by layer under a light source, so resolution in the build plane is set by the light engine and resolution in the build direction by layer height. In practice that means small features, sharp edges and legible text reproduce well, and surfaces can be sanded and polished to remove layer lines. What it does not reproduce reliably is a feature smaller than the practical minimum wall the part can survive, because thin sections tear during support removal and cleaning.
| Feature | How SLA behaves | Design response |
|---|---|---|
| Fine text and small logos | Reproduces well in the build plane | Keep the feature in-plane rather than on a steep surface |
| Thin walls | Possible but fragile during finishing | Increase thickness where the part will be handled |
| Internal channels | Formed accurately if resin can drain | Provide drainage paths and avoid blind pockets |
| Large flat panels | Distortion risk and wasteful build volume | Consider another process for flat geometry |
| Snap fits and live hinges | Brittle in standard resin | Choose a tougher engineering resin |

Why orientation is a design decision, not a build setting
A resin part is held on supports during the build, and those supports leave small marks wherever they meet the surface. Orientation therefore decides both where the marks appear and how accurate the part is. A face built flat against the platform holds its form but risks distortion in the first layers; a face built at an angle is more stable but requires more supports on the surface behind it.
The practical rule is to name the critical face. If the supplier knows which surface has to stay clean and which is hidden inside an assembly, the build can be oriented so supports land on the hidden side, and the critical features can be positioned in the plane where the process is most accurate. That single instruction removes more rework than any tolerance discussion.
Should a resin prototype be hollowed to save cost?
Only when it can drain and the wall survives handling.
Hollowing reduces the resin consumed and, on thick parts, reduces the risk of internal shrinkage, so it can lower cost. The trade-off is that a hollow shell needs drain paths for uncured resin and a wall thick enough to tolerate cleaning and support removal. A hollow part with trapped liquid will cure unevenly later and distort, which is a worse outcome than the resin it saved.
Where a part is thin already, hollowing achieves nothing and adds risk. Where a part is a solid block that only needs its outer form, hollowing is often the single biggest cost reduction available, provided the drain path is designed rather than improvised.
Post-processing and what it changes
Every resin part is washed to remove uncured material, separated from its supports and cured. Beyond that, sanding and polishing change appearance, and on clear parts they change transparency. Those steps have limits worth knowing before specifying them: heavy sanding removes fine detail, polishing rounds sharp edges, and both are manual work charged per part rather than per build.
Two instructions prevent most disappointment. State whether the part is a visual model or a fit model, because the finishing effort differs substantially, and name any face that must not be sanded so a mating surface does not lose its geometry. Where a part will be painted, a light surface preparation also improves adhesion, which makes finishing part of the part’s function rather than decoration. Process terminology is standardised through ASTM Committee F42 on additive manufacturing, and application guidance is published by ASME and UL Solutions.
When resin stops being the right process
Resin loses to powder-bed processes when the part is large, when it has to survive repeated handling or load, or when a flat panel is the main geometry. SLS and MJF produce nylon parts with better toughness and no support marks, at the cost of a grainy surface and coarser small detail. Machining wins when the prototype has to behave like the production material or when a critical fit has to be established in metal.
The useful way to decide is to name the test the prototype has to pass. Detail and appearance point to resin; repeated assembly and drop testing point to a powder-bed nylon; load, heat and fit in metal point to machining or metal printing. Comparing those three options is easier with the process pages side by side, and the material options are listed on the MJF, SLS and 3D printing materials pages. Material data references are published by ASM International, measurement practice by the NIST Manufacturing Extension Partnership, and resin handling obligations by US EPA rules.
Checking a resin part when it arrives
Three checks catch most problems. Measure the dimensions that matter for fit only after the part is fully cured, because resin continues to change slightly after printing. Look for support marks on faces that were supposed to remain clean, and for tacky areas that indicate incomplete cure. Then confirm the functional point: whether the part fits, snaps or seals as the design intended.
For a repeat order, agree what must stay the same. Resin batch, orientation and post-processing all influence the result, so a part that measured correctly once is not automatically reproducible. Naming the dimensions and surfaces that must repeat is what makes the second delivery predictable.
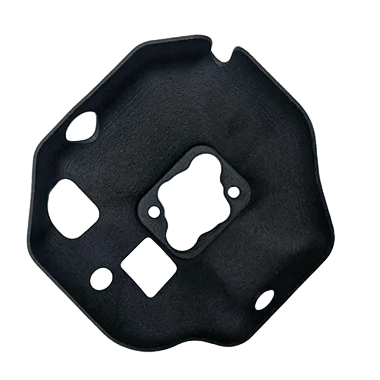
Send the model with the faces to protect and the test the part must pass, and request an SLA prototype part quote with orientation feedback.
FAQ
What detail can SLA hold compared with SLS?
SLA reproduces finer features and smoother surfaces because it builds from a liquid resin with a fine light spot, while SLS produces a grainy nylon surface and loses some small detail. SLA also allows the surface to be sanded and polished where SLS texture cannot be removed easily.
Can SLA parts be used as end-use parts?
They can where the application tolerates photopolymer behaviour, such as covers, housings or light-duty brackets. Where the part carries sustained load, heat or outdoor exposure, a production material and process are the safer route.
Do resin parts need a support structure removed by hand?
Yes. Supports hold the part during the build and are removed afterwards, which leaves small witness marks. Choosing the orientation so supports meet a hidden or non-critical face is the way to keep the visible surface clean.