

A resin prototype that comes back warped, chalky, or scarred on the one face that seals against a gasket costs more than the part: it costs the review meeting, the test slot, and a second round of approvals. The specification you send with an SLA 3D printing service decides most of that outcome. This guide covers what to put in the request, how resin choice and build orientation shape the result, and which finishing and inspection steps keep a resin part usable after it leaves the machine.
What should you send with an SLA request?
Send geometry, material intent, and acceptance criteria.
A complete package removes the guesswork that triggers re-quotes: the CAD model, the surfaces that matter, the finish you expect, the environment the part will see, and how you will judge the result on arrival.
Most service providers, including 6CProto, quote from native or neutral CAD files such as STEP, STP, IGES, IGS, SLDPRT, 3DM, SAT, and X_T. A STEP file is usually enough for quoting, but the drawing still carries information the model cannot: which faces are datums, where threads and inserts belong, and which surfaces must not be touched during support removal. Add quantity, target date, and the acceptance criteria you intend to apply, because a part judged against an unstated standard is a part that gets disputed.
6CProto reviews manufacturability before production starts and returns a DFM report, so the file you send is checked against the process before resin is committed. Adding the reference points your metrology team uses, and naming the one or two features that carry the function, is what turns that review into a useful conversation rather than a list of generic warnings.
Which resin family fits the function?
Choose the resin by the failure mode you cannot accept.
Standard resins resolve detail but stay brittle under impact; tough and high-temperature grades cost more, so name the property first and the cosmetic look second.
Photopolymer families are grouped by the property that dominates their behaviour. Detail-driven parts such as display models, mold masters, and presentation housings usually run in a standard rigid grade. Parts that will be handled, dropped, or snapped together need a tough grade with higher elongation. Anything that sees heat, from a fixture near a reflow oven to a housing around a warm board, needs a high-temperature grade that holds shape after curing. Transparent and translucent grades add a separate set of process decisions covered in the finishing section below. The process itself, including how layers are cured and post-cured, is documented in the Formlabs guide to SLA printing.
The practical test is to describe the service condition rather than the material name. A supplier who knows the part will sit in a fixture at elevated temperature, or be screwed down once and never touched again, can match a grade to that load case. Vendor documentation such as the Formlabs material library is useful for comparing published property categories before the conversation, but the grade your manufacturer actually stocks, and its documented cure schedule, decides what you receive.
| Family | Property that drives selection | Typical parts |
|---|---|---|
| Standard rigid | Fine feature resolution, low cost | Display models, form studies, mold masters |
| Tough / durable | Impact resistance and elongation before break | Snap-fit housings, brackets, handled enclosures |
| High temperature | Dimensional stability after post-cure | Fixtures near heat, air ducts, warm electronics covers |
| Transparent / translucent | Light transmission after polishing | Light pipes, covers, fluid visualization |
| Specialty (filled, flame-retardant, static-dissipative) | Compliance or electrical behaviour | Housings with a flammability callout, ESD-sensitive assemblies |
What tolerances and minimum features can SLA hold?
SLA resolves fine detail; accuracy depends on geometry.
Feature resolution is excellent; absolute accuracy is set by resin shrinkage, support removal, and any polishing, so reserve tight tolerances for the faces that carry function.
Three mechanisms move a resin part away from nominal. Photopolymer shrinks as it cures, and the direction of that shrink follows the build. Supports create small contact marks wherever they meet the part, which matters most on optical and sealing surfaces. Finishing then removes material deliberately, so a polished face is not the same face that came out of the machine.
That is why drawings covered in blanket tolerances tend to come back with exceptions. A better approach is to define a primary datum from the part’s function, put tight tolerances only on the interfaces that mate, and give the remaining surfaces a general tolerance class. Where a feature is genuinely critical, say how you will measure it; a callout that cannot be inspected at prototype quantity becomes a note rather than a requirement. 6CProto publishes its tolerance framework on the standards and tolerances page, and the right sequence is to confirm the achievable range for your specific feature before the drawing is released rather than after the first article arrives. How additive processes are measured and qualified is the subject of the NIST additive manufacturing program, which is a useful reference when a customer’s quality system asks where a capability statement comes from.
How do build orientation and supports decide surface quality?
Orientation decides where layer lines and scars appear.
Curved and angled faces show stair-stepping against the build direction, and every support leaves a witness mark, so the part is oriented to protect the surfaces you will not polish.
Put the part in the machine so that the cosmetic face either points away from the platform or sits at an angle where layer steps are least visible. Sealing faces, bearing surfaces, and optical windows should face away from supports; the marks they would otherwise collect are the hardest to remove without changing dimensions. Build direction also creates a plane of lower strength in resin parts, less pronounced than in extrusion printing but still present, so load-bearing features should not be oriented so that the highest stress crosses the layer plane.
Where a part must sit in an awkward orientation for accuracy reasons, the DFM step is the moment to trade orientation against finishing cost. The 3D printing design tips library covers the geometry rules that keep this trade manageable: minimum feature sizes, wall thickness, escape paths for uncured resin, and the clearances that stop supports from fusing into a cosmetic surface.
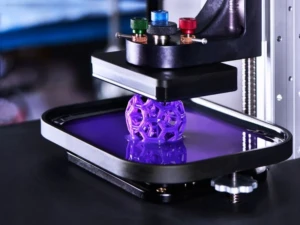
Which finishing route suits the part, and how does it change dimensions?
Match each finish to the surface it must serve.
Sanding and polishing remove material and can hold a measured dimension only if the drawing allows for it; blasting gives a uniform matte look without chasing a tolerance, and coating adds material back.
As-built resin surfaces carry layer steps and support scars. Removing them is a sequence rather than a single operation: support removal, then progressive sanding where the surface must read clean, then polishing or a clear coat if light must pass through. Each step takes material from the surface, and on thin walls or close-tolerance bores that removal is the difference between a part that fits and one that does not.
Media blasting sits at the other end of the scale. It produces a consistent matte finish across a whole batch, hides minor print texture, and is usually the fastest way to make a set of parts look like a set. It does not remove deep steps, and it rounds edges slightly, so it belongs on cosmetic surfaces rather than on press fits.
| Route | What it produces | Dimensional effect |
|---|---|---|
| Support removal only | Untouched surfaces with visible contact marks | Marks sit proud of the nominal surface |
| Progressive sanding | Even surface, layer steps reduced | Removes material; tight on thin walls |
| Media blasting | Uniform matte texture across a batch | Slight edge rounding, minimal overall removal |
| Polishing | Gloss or optical clarity | Measurable removal on curved faces |
| Primer and paint | Colour, texture, and UV protection | Adds a layer that must be allowed for in fits |
The surface finish guides collection explains how each option is normally specified. The one habit that prevents trouble is writing the finish and the dimensional budget on the same line of the drawing, so the shop knows how much material it is allowed to remove.
What drives the cost of an SLA part?
Cost follows machine time, resin tier, and hand work.
Tall parts, thin layers, dense supports, and a polished finish each add time; the cheapest quote is usually the one that matches the finish to the function instead of applying a premium finish everywhere.
Four inputs dominate. Build height and layer count set machine time, which is the largest lever on any single part. Support volume scales with overhangs and with how carefully the part is oriented. The resin grade itself changes the price per part, and specialty grades with compliance properties cost more than general-purpose ones. Finally, post-processing is hand work: support removal, sanding, blasting, and polishing are priced in labour minutes, not machine minutes.
Two choices lower cost without touching quality. Grouping several small parts into one build spreads machine time across the batch, and agreeing on an as-built or blasted finish for hidden surfaces keeps hand work where it adds value. Reprinting is the expensive option, so the cheapest route through a project is usually a DFM review that catches a support problem or an unmeasurable tolerance before the build starts. Requests received through the quote flow are reviewed this way, which is why the note you attach to the file matters as much as the file itself.
How do lead time and repeat orders work on an SLA program?
Lead time is queue, build, finishing, and inspection.
Each stage can be compressed by decisions made before the order: a frozen specification, an agreed acceptance method, and a defined finishing recipe cut the back-and-forth that adds days.
Once a part is in production, the clock is dominated by machine availability, build duration, and the hand work that follows. Nothing on that list is shortened by asking for the part sooner after the build has started; what changes it is agreeing the details first so the part enters the queue complete. Explicitly state whether small surface marks are acceptable on non-cosmetic faces, and whether dimensional reporting is required, because both answers change how much finishing and measurement the part receives.
Repeat orders behave differently from first orders, and this is where resin programs usually lose consistency. A second batch is only identical to the first if the resin grade, the build orientation, the support strategy, and the finishing recipe are carried forward. That is why it is worth asking for those parameters to be recorded against the part number: the same file printed at a different angle, in a different grade, or finished by a different hand is a different part in everything but name.
What belongs in the inspection report for a resin part?
Report what the part is for, not everything you can measure.
A useful report covers the critical dimensions, the appearance standard, and the fit checks that matter, with the method named so a second person can repeat the same judgement.
For most resin parts, three groups of results are worth documenting. Dimensional results on the datum and the mating features tell you whether the part will assemble. Appearance results, recorded under a stated lighting condition rather than in general terms, settle any argument about scratches, blush, or visible layer steps. Functional checks, such as a boss accepting its screw or a housing closing without a gap, catch the errors a caliper cannot.
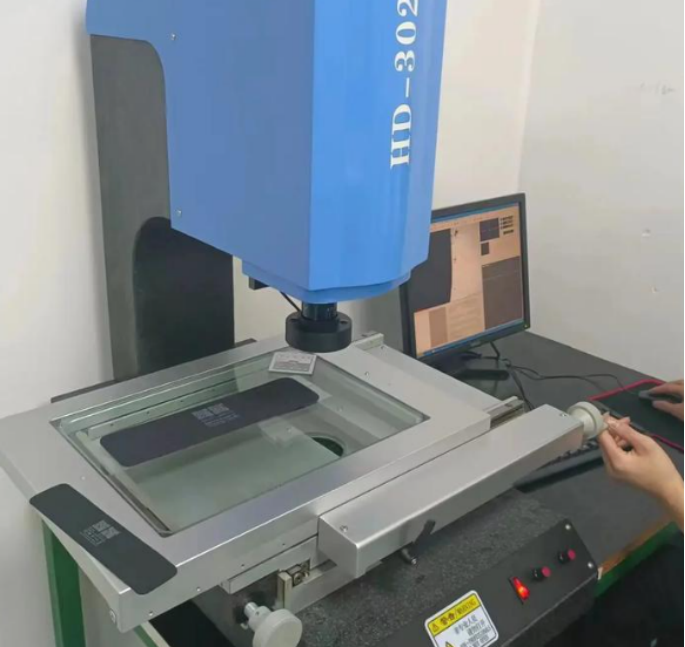
Ask for the report at the same time you agree the acceptance criteria, and say whether you need it for incoming inspection, a design review, or a supplier qualification file. 6CProto provides quality inspection reports on request alongside a dedicated project manager who follows the order through production, so the reporting format can be agreed at the DFM stage instead of being reconstructed afterwards. Where a program needs third-party verification rather than an internal record, certification bodies such as UL publish their additive manufacturing service scope, which is worth reading before you promise a customer a certificate you may not need.
How does SLA compare with SLS and MJF for the same part?
SLA wins detail; powder-bed nylon wins service loads.
Resin wins on fine features, smooth surfaces, and clear parts; SLS and MJF win where the part must survive impact, repeated handling, or exposure to heat in a nylon housing.
The dividing question is what the part has to prove. If the test is about fit, form, appearance, flow visualization, or a smooth aerodynamic surface, resin resolves details that powder-bed processes round off, and it needs no support-free geometry rules. If the test is about surviving a drop, carrying a load, or living inside a product for months, nylon has the property set, and the design rules change accordingly.
For parts that sit on the boundary, the productive approach is to print the same geometry both ways and test the one that matters. The process trade-offs across extrusion, resin, and powder-bed printing are compared in this 6CProto article on FDM, SLA, and SLS process selection. Standards work in this area is coordinated through ASTM committee F42 on additive manufacturing, which maintains much of the shared terminology these comparisons rely on; the earlier terminology standard ASTM F2792 is still the reference many drawings quote.
RFQ checklist before you upload
A quote is only as good as the information behind it. The checklist below takes a few minutes and prevents most of the back-and-forth that pushes a prototype past its review date. Where an answer is genuinely unknown, say so rather than leaving the field blank, so the DFM review can address it directly.
- CAD file in an accepted format, with the primary datum identified
- Critical features listed with the tolerance each one needs
- Environment the part will see: temperature, UV, contact with fluids, handling
- Finish for each visible surface, and the surfaces that may be left as-built
- Quantity, target date, and whether the parts belong to one build or several
- Acceptance method: which dimensions will be measured, and with what
- Interface details for threads, inserts, and press fits
- Whether the same part will be ordered again, so parameters can be recorded
Deciding what to fix before the next build
The specification, not the machine, is the variable you control first. Resin grade sets the property ceiling, orientation and supports decide which surfaces survive intact, finishing decides whether the part measures what you intended, and the inspection agreement decides whether anyone argues about it afterwards. Where a project goes wrong, the cause is usually visible in the request: a tolerance that cannot be measured at prototype quantity, a support mark on a sealing face, or a colour requirement that appeared after the first build.
The parts that arrive ready to test share a pattern. Their drawings mark a small number of critical features, their finish callouts allow the shop to remove material where it must, and their acceptance criteria are agreed before production rather than after delivery. Applying that pattern to the next resin part is a shorter exercise than diagnosing why the last one failed.
FAQ
How much does SLA printing cost?
There is no single rate, because four variables move together: machine time set by build height and layer count, the volume of supports the geometry needs, the price tier of the resin grade, and the labour minutes in finishing. A part quoted as-built with a functional finish costs less than the same geometry polished on every face. Send the file with the finish per surface and the quantity, and the quote will reflect the work the part actually needs rather than a default assumption.
Can an SLA part be used for functional testing, not just appearance?
Yes, with the right grade and orientation. Tough and high-temperature resins are specified for handled parts and warm environments, and orientation can be arranged so that the highest stress does not cross the layer plane. What limits functional testing in resin is usually creep under sustained load rather than a single impact. If the test involves a long-term load or continuous heat, say so in the request and treat the result as a design check rather than a service-life prediction.
How should threads and inserts be specified on a resin part?
Avoid printed threads where the joint will be assembled more than a few times. Model the pilot hole for a self-tapping screw, or a pocket for a heat-set insert, and state the hardware you intend to use. Printing a coarse thread directly is possible, but the flanks wear quickly and the pitch is affected by shrinkage. Both options need clearance in the model, and the DFM review is the right place to confirm which one suits your assembly process.
Does a clear resin part need different handling from an opaque one?
It needs more, because every surface defect is visible. Clear parts are handled with gloves and packed individually to avoid scuffing, and masking is planned so that critical faces are polished last. Ultraviolet exposure is also a factor: clear resins can change tone over time in sunlight, so a part intended for outdoor service should carry a coating or be specified in a grade that accounts for it.
If you have a resin part where a few features decide whether it passes, send the model with the datum and the acceptance criteria marked. 6CProto reviews manufacturability before production and returns a DFM report with the quote, so the first build answers the question you are actually asking. Upload the file at the 6CProto quote page, or reach the engineering team at projects@6cproto.com.