

The question is rarely whether a prototype mold is cheaper, because it obviously is. The question is what the program gives up by choosing one, and whether the difference matters for the quantity the product will actually run. A prototype tool delivers parts sooner and absorbs a change more cheaply; a production tool runs longer, holds tolerance better and costs less per part. This comparison sets out how the two are constructed, how their costs are structured, where lead times differ, how each handles changes after sampling, and how to decide with the volume forecast you actually have.
Should a program build a prototype mold or a production mold?
Build the prototype tool unless the design is proven.
A prototype mold is the economical choice while the design can still change, and a production mold is justified once the geometry, material and assembly are settled.
The logic turns on the cost of change. A prototype tool is built from materials that machine quickly and is designed to be modified: inserts can be replaced, gates can be re-cut, and draft can be added. A production tool is built for life, often from pre-hardened or hardened steel, with optimised cooling and a cavity count that matches the volume. Modifying it is possible but expensive, and a change that affects the cavity form can mean re-machining or replacing a component.
That means the two tools are economic answers to different questions. While uncertainty remains, the ability to change is worth more than the ability to last. Once uncertainty is resolved, the reverse is true: the cost per part from a production tool is lower, and the tool can be amortised across the volume the product will run.
Where the program is confident in the design but has not yet proven it in molded parts, the intermediate route is a bridge tool, which is built for a defined quantity with more durable construction than a prototype tool and more flexibility than a production tool.
How is each tool constructed?
Prototype tools favour speed; production tools favour life.
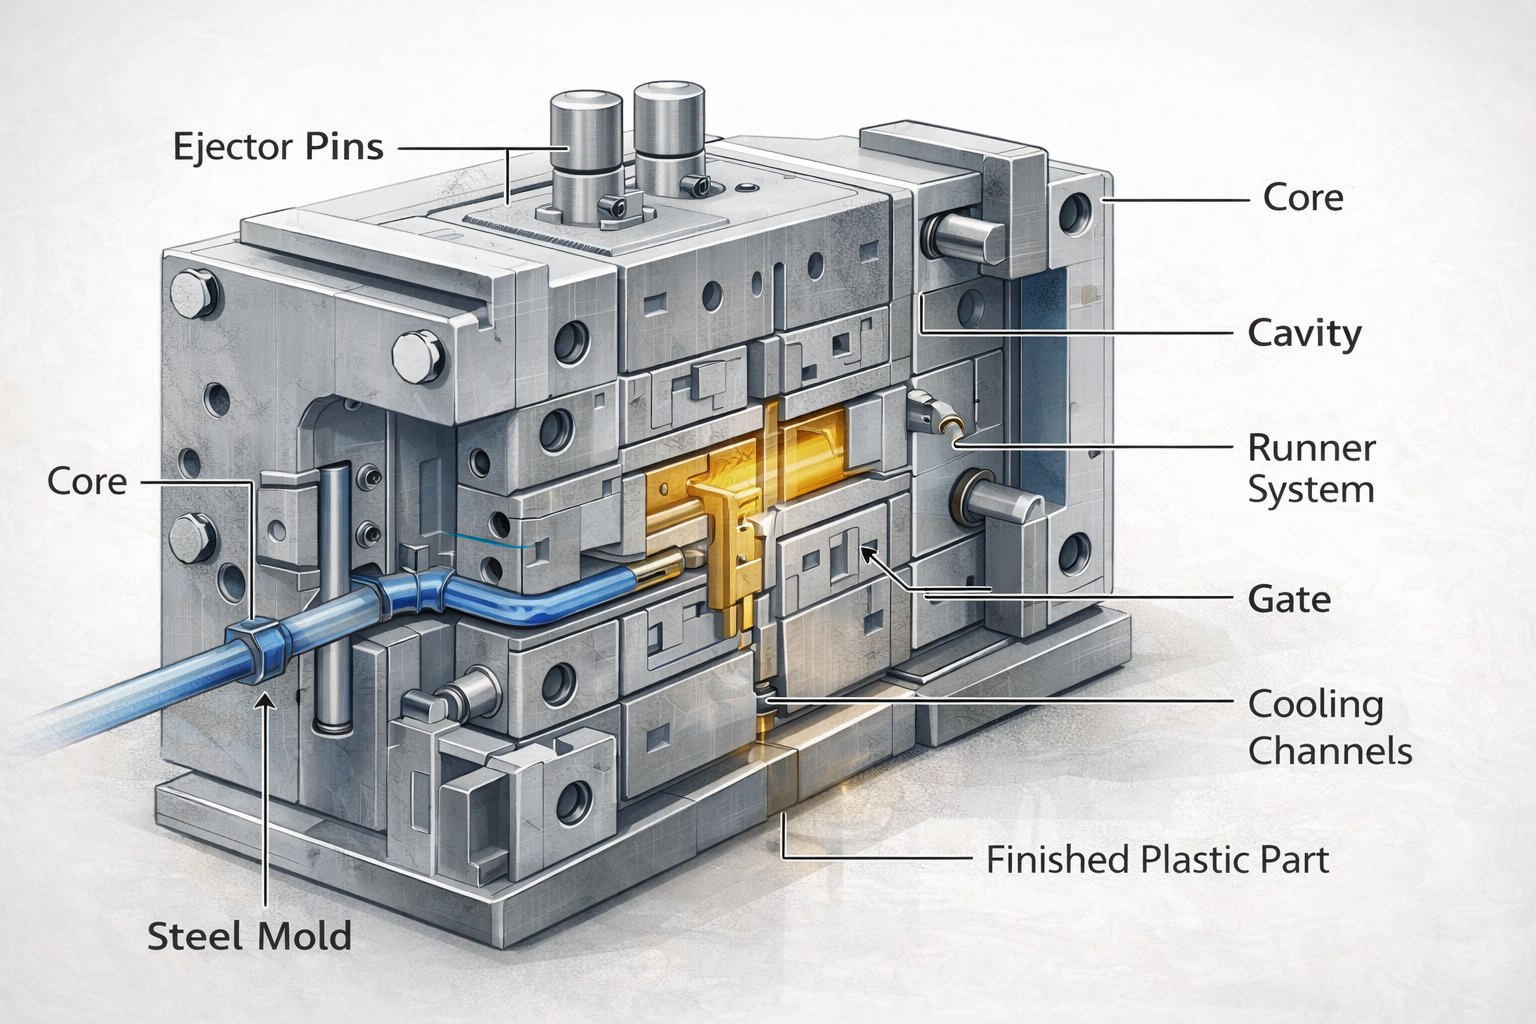
Prototype tools use easy-to-machine materials and simplified cooling, while production tools use durable steels and an optimised cooling layout.
Material choice is the visible difference. Aluminium and softer steels machine quickly, which shortens delivery, but they wear at gates, shut-offs and parting lines. Hardened steels take longer to machine and often require heat treatment, and they hold their form across a long run. Where a prototype tool runs an abrasive resin, wear at the gate appears quickly, which is why gate inserts are often specified even on a validation tool.
Cooling is the second difference. A prototype tool usually has straight drilled channels placed wherever the geometry allows, which is quick to make but may not cool the part evenly. A production tool optimises the circuit, sometimes with conformal cooling produced by metal additive manufacturing, to reduce cycle time and control shrinkage. That difference affects both cycle time and dimensional consistency, though not to the point that prototype parts are unrepresentative when the same resin is used.
Cavity count is the third. Prototype tools are usually single cavity because the parts are needed for validation rather than for volume. Production tools run the cavity count the volume justifies, which brings balance considerations and a different set of quality checks. The tool construction decisions that follow from these differences are explained in the 6CProto article on what drives injection mold tooling cost.
How do cavity count and cycle time differ?
One cavity validates; several cavities produce.
A prototype tool typically runs a single cavity with a standard cycle, while a production tool runs multiple cavities with optimised cooling to minimise cycle time.
Cavity count is a direct answer to volume. A single cavity produces one part per cycle, which is entirely adequate for validation and for small quantities. As volume rises, the number of cavities determines how many parts are produced per cycle, and the tool cost rises accordingly. The trade is straightforward: more cavities cost more to build and take longer to deliver, but they reduce the machine time each part consumes.
Cycle time depends on cooling and on part thickness. A production tool with an optimised cooling circuit reaches ejection temperature faster, and the multi-cavity arrangement spreads the machine time across more parts. Together those two effects are what make production molding economical at volume.
What the prototype run can tell you is roughly what the cycle will look like, not precisely. The simplified cooling of a prototype tool means the cycle time measured on it is indicative rather than final, and treating it as the production cycle can lead to a cost model that does not survive contact with the production tool. Where cycle time is important to the business case, it belongs in the production tool’s sampling plan rather than in the prototype’s.
| Factor | Prototype mold | Production mold |
|---|---|---|
| Construction | Aluminium or soft steel, simplified cooling | Durable steels, optimised cooling |
| Cavity count | Usually single | Matched to volume |
| Lead time | Shorter | Longer, with heat treatment in many cases |
| Cost per part | Higher | Lower at volume |
| Change tolerance | High | Low, and expensive |
| Expected life | Validation quantities | Product life |
| Typical role | Prove the design | Run the product |
How is the cost structured in each case?
One is dominated by the tool, the other by the parts.
A prototype tool carries a lower tool cost and a higher cost per part, while a production tool carries a higher tool cost and a lower cost per part, so the decision depends on quantity.
The structure is simple to describe. Tool cost is fixed and has to be amortised across the quantity produced. Running cost per part depends on cycle time, cavity count, material and any secondary operations. The prototype tool reduces the fixed cost and raises the variable cost; the production tool does the opposite.
Two quantities matter for the decision. The first is how many parts the program will produce in total, including spares and any variants. The second is how likely the design is to change, because a change consumes part of the prototype tool’s advantage. Where the design is stable and the volume is high, the production tool wins clearly. Where the volume is low or the design is uncertain, the prototype tool usually wins even though its cost per part is higher.
A third option deserves to be priced as well: a bridge tool, which sits between the two. It costs more than a prototype tool and less than a production tool, produces parts at a lower cost per part than the prototype tool, and can supply early units while the production tool is made. Where a launch date sits inside the production tooling schedule, that option often resolves the decision. Resin specifications and their test methods are published by ASTM committee D20, and any coating applied to the finished part follows the framework of ASTM committee B08.
How does lead time differ?
A prototype tool is delivered sooner.
Aluminium and soft steels machine faster and usually need no heat treatment, while production tools involve more machining, more components and often a hardening step.
The difference is largest on complex geometry. A production tool with optimised cooling, multiple cavities and hardened components accumulates machining hours that a simple validation tool does not need. The result is a schedule measured in weeks rather than days for the tool itself, plus the sampling and approval that follow.
Sampling is the second stage of lead time, and it is not reduced by choosing a prototype tool. Parts have to be produced, measured and approved, and where a change is required, the tool has to be adjusted and sampled again. Allowing for one revision in the schedule is a realistic planning assumption for a new design, and it is the reason prototype programs that skip that allowance tend to slip.
The practical way to plan is to work backwards from the date parts are needed. Design freeze, tool build, sampling and one revision all have to fit inside the window, and the choice of tool determines how much of that window the build consumes.
How do design changes behave after sampling?
Cheaply on a prototype tool, dearly on a production tool.
Prototype tools are built so gates, inserts and cavity details can be modified; hardened production components make changes slower and costlier.
The difference is not only cost but also disruption. A prototype tool can often be modified in place, with an insert replaced or a gate re-cut, and sampled again within days. A production tool that has already been hardened may need a component removed, re-machined or replaced, and the change has to be validated against the parts already produced.
Designing for change is therefore a deliberate choice, not a lucky one. Where a program knows a feature is likely to move, such as a connector cut-out or a mounting boss tied to another supplier’s component, building that feature as a replaceable insert makes later changes routine. Both tool types can be built this way; it is simply more often done on prototype tools because changes are expected. The tooling cost factors behind those choices are set out in the existing 6CProto article on injection mold tooling cost, and the quality framework that supports tool qualification is published by NIST MEP.
The practical guidance is to name the uncertain features at the tooling review and decide, consciously, whether the program is buying the ability to change them. Where the answer is yes, the tool construction should reflect it and the quote should cover it.
Can a prototype tool serve as a bridge?
Sometimes, within a defined quantity.
A prototype tool can supply early production units if it is built with sufficient wear resistance at the gates and shut-offs and if the quantity is within what it can sustain.
Whether that works depends on three things: the material being molded, the geometry’s demands at the wear points, and the quantity required. An unfilled resin running a modest number of parts asks little of the tool. An abrasive filled resin running thousands of parts will wear an aluminium gate quickly, and specifying a steel gate insert at the design stage both extends the tool’s life and costs little to add.
Where the bridge quantity is substantial, the honest answer is to build a tool designed for it, rather than to extend a validation tool beyond what it can do. The distinction is worth stating explicitly in the tooling request: whether the tool is expected to produce parts for validation only, or to supply the market for a defined period.
That clarity changes the proposal, because it changes the wear points, the materials and the cavity count. A request submitted through the quote flow that states the bridge quantity and the resin will return a tool recommendation matched to those facts rather than to a generic assumption. Resins behave differently at the gate depending on their filler content, and the relevant specifications are published by ASTM committee D20, with the materials engineering context from ASM International.
Deciding with the forecast you have
The decision needs three inputs, none of which is a guess: the total quantity expected across the product’s life, the likelihood that the design will change, and the date parts are needed. With those three, the tool type follows with little ambiguity.
Where the forecast is genuinely uncertain, the useful approach is to price both options against a range of quantities and to look at where the curves cross. A prototype tool that costs less but produces at a higher cost per part becomes the wrong answer once the volume passes a threshold that the pricing makes visible. Where the crossover sits beyond any plausible forecast, the cheaper, more flexible tool is the rational choice regardless of how the program feels about it. That comparison, plus a documented sampling gate before production tooling is committed, is what protects the investment. The validation gates that should be passed before ordering tooling are described in the 6CProto article on prototype validation gates, and the manufacturing quality framework behind them is published by NIST MEP.
Choosing between the two
The prototype mold buys flexibility and speed; the production mold buys cost per part and life. Programs that are still resolving the design should buy the first, and programs with a settled design and a real volume should buy the second. Where the schedule sits between the two, a bridge tool is the honest middle answer rather than a compromise.
Two practices keep the decision sound. State the total quantity and the change risk in the tooling request, so the proposal is built around facts rather than assumptions. And treat the sampling stage as a gate with written criteria, so the production tool is only committed once the evidence supports it. The resin specifications that underpin those criteria come from ASTM committee D20, and the mechanical testing methods from ASTM committee E28.
FAQ
What is the difference between a prototype and a production mold?
Construction and purpose. A prototype mold is built quickly from easily machined materials, usually with one cavity and simplified cooling, so that parts can be produced for validation and the tool can be modified cheaply. A production mold is built for life, with durable steels, optimised cooling and a cavity count that matches the volume. Both can produce representative parts when the production resin is used.
How long does a prototype mold take compared with a production mold?
A prototype tool is consistently faster because it requires less machining and usually no heat treatment, and because its cooling layout is simpler. The gap widens with complexity: a production tool with several cavities, optimised cooling and hardened components accumulates far more machining hours. Sampling and approval time is similar for both, and it should be allowed for in the plan.
Can a single-cavity prototype mold be used for small production runs?
Yes, within limits. A single cavity produces one part per cycle, which is adequate for modest quantities and for early production units. Whether the tool can sustain the run depends on the resin and the geometry: abrasive filled materials wear an aluminium gate quickly, while unfilled resins are gentler. Specifying a steel gate insert at the design stage is an inexpensive way to extend what the tool can deliver.
When does a production mold become the cheaper option?
When the amortised tool cost plus the lower running cost drops below the prototype tool’s equivalent at the forecast quantity. Because the production tool costs more up front and produces at a lower cost per part, the comparison crosses at a specific quantity that depends on the part, the cavity count and the resin. Pricing both against the actual forecast is the only reliable way to find that point.
If the choice between a validation tool and a production tool is still open, send the model with the total quantity you expect, the resin and the date parts are needed. 6CProto reviews the design, prices the options against your forecast, and returns a DFM report with the quote. Upload the file at the 6CProto quote page or send it to projects@6cproto.com.