

A molded part starts clean and develops a thin fin of plastic along the parting line by mid-run. The fin is flash, and it is one of the most useful symptoms in molding: it tells you that plastic is escaping where the mold should be sealed, and the location of the flash points to the cause. Flash is never random — it appears where clamping force, mold fit, venting, or process pressure lost their balance, and reading the location is the first step in fixing it without chasing the whole process.
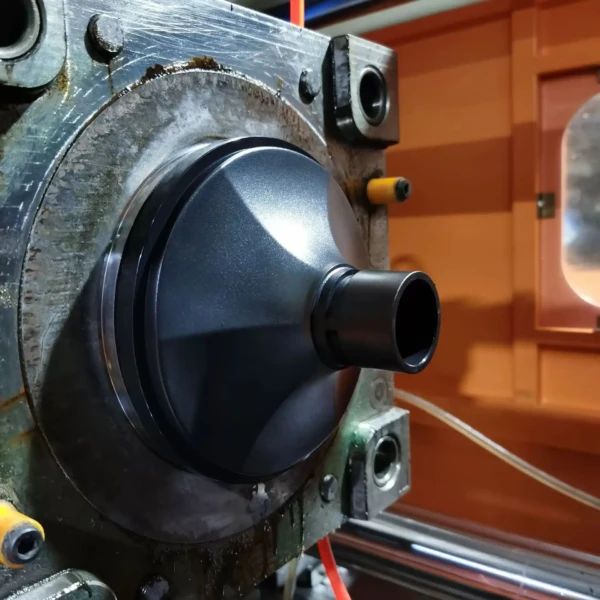
Where flash appears and what it tells you about the mold
Flash appears at mold interfaces: the parting line, around ejector pins, at slides, and around core pins. Parting-line flash usually means the mold faces are not sealing under injection pressure — either the clamp force is too low for the projected area or the faces do not fit. Flash around ejector pins and slides means those components are worn or their clearance is too large. Flash in one local area rather than all around points to a local problem: a damaged parting-line edge, a dirty face, or an uneven clamp. The location is the diagnosis, so record where flash appears before changing any setting.
Clamping force and vent-depth balance
Flash is a contest between injection pressure pushing the mold open and clamp force holding it closed. If the clamp force is too low for the cavity pressure and the projected area, the mold breathes and plastic escapes. The fix is not always more clamp force, because excessive clamp can damage the mold and does not help if the parting line is locally damaged. The balance also includes vents: vents must be deep enough to let air out but shallow enough that plastic cannot fill them — and worn or over-deepened vents are a common source of localized flash that looks like a parting-line problem.
| Flash location | Likely cause | First check |
|---|---|---|
| All around the parting line | Clamp force low for cavity pressure | Projected area vs clamp; packing profile |
| One local parting-line area | Damaged or dirty mold face | Inspect the face; clean and repair |
| Around ejector pins | Worn pins or excessive clearance | Pin fit; replace or rework |
| At vents | Vent depth too deep or eroded | Check vent depth against material |
The table is the first filter for any flash complaint: match the location to the cause before adjusting the process, because a clamp-force change will not fix a worn ejector pin.
Mold wear, parting-line damage, and maintenance triggers
Flash that appears gradually over a run or over weeks of production is a wear story. Parting-line faces wear from repeated clamping, ejector pins wear from sliding, and small dents or nicks catch plastic and grow into flash sources. The maintenance trigger is not a fixed shot count; it is the trend — if flash appears in the same location more often or at lower pressures, the mold is telling you it needs service. Clean and inspect the parting line on a schedule, and keep a record of where flash appears so the trend is visible.
Damaged parting-line edges should be repaired by a mold shop rather than hidden with more clamp force. A local nick can be welded and re-cut, or the face can be re-lapped if the damage is light; the repair restores the seal that the process depends on.
Process-side causes that look like mold problems
Not every flash is mold wear. Excessive packing pressure or a packing profile that spikes near the end of fill can open the mold at the parting line, producing flash that disappears when the profile is corrected. Melt temperature that is too high reduces viscosity and lets plastic penetrate smaller gaps. Overfill — injecting more material than the cavity holds — is another process cause. Before cutting steel, run a short experiment: reduce packing pressure in steps and watch whether the flash changes. If it does not, the cause is fit or wear, not pressure.
Design changes that reduce flash risk on new parts
Flash risk starts at the design stage with the projected area and the parting line. A part with a large projected area needs more clamp force at a given pressure, so reducing the projected area, balancing the part across the parting line, or choosing a parting line that follows a stiff section reduces the clamp demand. Wall thickness and flow length affect the pressure needed to fill, and a design that fills at lower pressure is easier to keep flash-free. Where the parting line is cosmetic, the design can place it on a less visible edge, but the functional requirement is that the mold seals — and the design should not create a knife-edge seal that wears quickly.
Deburring vs fixing the root cause: cost comparison
Deburring flash is a cost that repeats every run: labor, handling, and the risk of damaging the part or missing flash on internal features. Fixing the root cause is a one-time cost — a mold repair, a process change, or a vent correction — that removes the recurring labor. The comparison is simple after a few runs: if the flash reappears every run, the deburring cost compounds, and the root-cause fix pays for itself quickly. Internal flash that cannot be seen or deburred is worse, because it ships inside the part; a root-cause fix is the only reliable answer there.
A floor example shows the diagnostic order in action. A mold that ran clean for three months starts flashing at one corner of the parting line. The operator first checks the process: packing pressure is unchanged, so the flash is not a process spike. The location is local, which rules out a global clamp problem, and the maintenance record shows the mold has not been cleaned since the last run. The mold is pulled, and inspection finds a small dent on the parting-line face where a part was pried loose — the dent catches plastic and grows flash with every shot. The repair is a local weld and re-cut of the face, and the process returns to normal. If the team had responded by raising clamp force, the dent would have stayed, the flash would have returned, and the mold face would have worn further under the extra force. The record of where flash appeared and when it started made the diagnosis fast: sudden onset pointed to an event, not wear, and the local location pointed to the face, not the clamp. The same logic applies to vents: a flash that appears along a vent after a material change may be a vent-depth problem, and measuring the vent depth against the material’s recommendation is the check that prevents a needless mold repair. Flash is a symptom with a location, and the location is the map to the cause.
The flash playbook at a glance: record where the flash appears and when it started; check the process history before touching the mold; match the location to the cause with the location table; repair local damage rather than masking it with clamp force; and track the trend so gradual wear is caught at the maintenance interval. Each step is cheap, and the sequence is what prevents a process change from hiding a mold problem or a mold repair from ignoring a process spike.
Frequently asked questions
Can flash be reduced by lowering injection pressure only?
Sometimes, but pressure is set by the part’s fill and packing needs, so lowering it below the requirement creates short shots or voids. The right sequence is to check whether the pressure profile has margin, then look at clamp force and mold fit. If flash appears at the normal pressure, the mold seal, not the pressure, is usually the issue.
Is flash a sign that the mold is worn out?
Not necessarily. Flash can come from a process change, a vent problem, or a local nick as easily as from overall wear. Compare flash occurrence against the run history: sudden flash points to a process or damage event; gradual flash points to wear. The mold may need a repair, not a replacement.
Does a stronger mold steel prevent flash?
Steel hardness helps the parting line resist wear and damage over many cycles, but it does not prevent flash if the clamp force or fit is wrong. A hard steel with a damaged parting-line edge flashes the same as a soft one. Steel selection extends the interval between repairs; clamp, fit, and process control prevent the flash.
The flash playbook in one paragraph
Record where flash appears, match the location to the cause, check the process before the mold, and repair the mold when the trend says wear. Deburring is a recurring cost that hides the symptom; the root-cause fix is the investment that removes the recurring labor. A mold that runs flash-free is not lucky — it is clamped, fitted, vented, and maintained on purpose.
If flash is appearing in a production tool, the 6CProto injection molding team can review the part geometry, the clamp and pressure settings, and the maintenance history to identify whether the fix is process, mold repair, or design.