

Insert molding is usually discovered late in a programme, when a plastic part needs a metal thread, a wear surface or an electrical contact and no other solution holds. By then the tool may already be designed, which is why the prototype route matters: it validates the insert geometry before the production mold exists.
What the process involves, step by step
An insert is placed into the mold cavity, located by a pin or a recess in the tool, and the mold closes around it. Plastic is injected so that it flows around the retention features on the insert — knurling, grooves, flats or holes — and when the part is ejected, the insert is mechanically locked in place. The critical step is the closing and locating action, because a tool that relies on an operator to hold the insert steady will produce parts that vary in insert height and angle.
| Stage | What has to be right | What fails if it is not |
|---|---|---|
| Insert manufacture | Retention features and dimensions | Insert pulls out or rotates under load |
| Loading into the mold | Positive location, not friction | Varying insert height and position |
| Injection | Flow around an obstruction | Short shot, weld line at the insert, poor bond |
| Cooling | Shrinkage against the insert | Stress cracks, distortion around the insert |
| Ejection | Support behind the insert | Insert pushed out of position or cracked plastic |
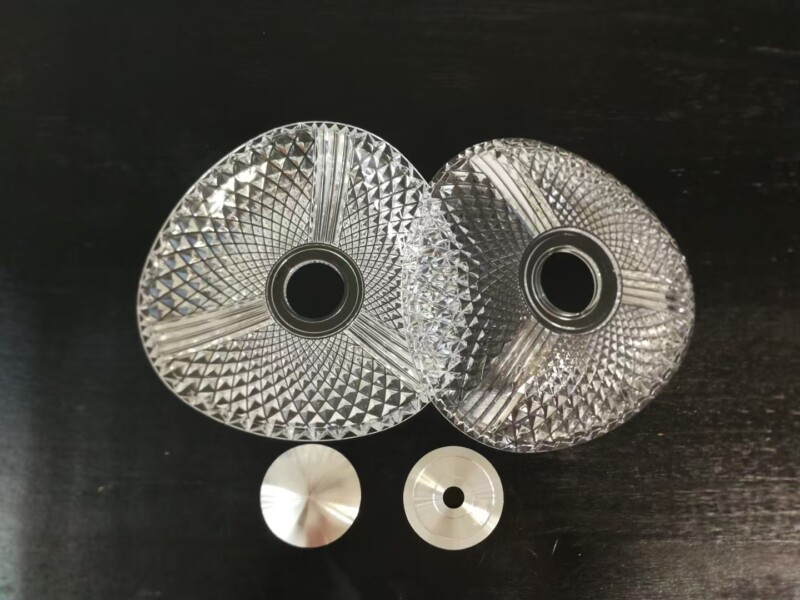
How prototype insert molding differs from production
Usually a single cavity, manual loading and a softer tool.
A prototype tool is built to produce enough parts to validate the geometry, the material and the insert behaviour rather than to run at volume. It normally has one cavity, the insert is loaded by hand rather than by a robot, and the cooling layout is simplified. That is enough to answer the important questions: does the plastic fill around the insert cleanly, does the insert stay where it was placed, and does the part hold up when the fastener is torqued.
What a prototype tool cannot tell you is the cycle time, the tool life and the insert placement repeatability of a production tool. Those depend on automation and on a hardened, properly cooled mold. Treating the prototype as a design validation rather than as a production forecast keeps expectations straight, and it is the reason the production tool should be designed from the validated insert geometry rather than from the original idea.
Why inserts are used at all
Inserts solve four recurring problems. A threaded insert gives a plastic housing a thread that survives repeated fastening, which a molded plastic thread does not. A wear sleeve provides a hard surface where a plastic bore would wear oval. An electrical contact provides conductivity and a sealed interface that an assembly of separate parts cannot match reliably. And a reinforcement plate stiffens a thin plastic section without thickening the whole part.
Each of those purposes sets a different requirement. A thread insert is judged by pull-out and torque resistance; a wear sleeve by hardness and fit; a contact by position and electrical continuity; a stiffener by the load it carries into the plastic. Stating which of those applies is what allows the prototype to be inspected against something meaningful rather than against dimensions alone.
Design decisions that make a prototype run succeed
Four design points decide whether the first trial produces a usable part. The insert should have a positive location feature that the tool can engage, so its position is set by the mold rather than by the operator. The surrounding plastic wall needs enough thickness to carry the load the insert transmits, and a boss with a radius at its base distributes that load better than a straight wall meeting a flat face. The gate should be positioned so flow reaches the insert region without creating a weld line across a stressed area. And sharp transitions between the insert and the plastic should be avoided, because they concentrate stress as the part cools.
Thermal behaviour also matters more than it appears. Metal expands differently from plastic, so a large insert surrounded by a thin wall can generate stress during cooling and crack the plastic or loosen the insert. Preheating the insert reduces that differential, which is one reason a large insert sometimes costs more than its size suggests. Material references on shrinkage and thermal behaviour are published by ASM International.
How to inspect a prototype insert molded part
Inspection should test the function the insert exists for. Measure the insert’s position and height relative to the part datums, because a misplaced insert will not accept its mating fastener; then test the retention with a pull-out or torque check on a sample rather than relying on visual inspection. Look also for incomplete fill where the melt had to flow around the insert, for weld lines in stressed areas, and for cracks in the plastic immediately around the insert.
For the report to be useful later, record the insert specification and its incoming condition as well as the molding parameters. A change of insert supplier can alter the retention features, and a different melt temperature changes how the plastic shrinks against the insert, so both belong in the record that accompanies the validated part. Process practice is described by the NIST Manufacturing Extension Partnership, drawing conventions follow ASME, the overmolding comparison sits under overmolding, and material handling obligations are set out by the US EPA.
Where the insert is itself a purchased component, its incoming specification is part of the technical file: retention features and tolerances have to be controlled as closely as the moulded part, and that expectation is set out in the production practice published by the NIST Manufacturing Extension Partnership.
Send the insert drawing with the load it carries and the part model, and request a prototype insert molding quote with a trial plan.
FAQ
What is the process of insert molding?
An insert is located in the mold cavity, the tool closes around it, and plastic is injected so that it flows through the insert’s retention features and locks it in place. The part ejects as a single item with the insert embedded.
How is prototype insert molding different from production?
A prototype tool usually has one cavity, manual insert loading and a simpler cooling layout. It validates fill, position and retention but cannot predict production cycle time, tool life or automation repeatability.
What should be inspected on an insert molded prototype?
Insert position and height relative to the part datums, pull-out or torque resistance on a sample, and any incomplete fill, weld line or cracking around the insert. The insert specification and molding parameters belong in the record as well.