

A soft-touch handle prototype feels perfect in the hand — until the test lab peels the TPE layer off the polypropylene core with a thumbnail after 200 cycles. The grip did not fail because the material was wrong; it failed because the design assumed a chemical bond that the material pair never promised, and the geometry offered no mechanical backup. Overmolding adds a second material onto a molded substrate, and every successful design rests on three decisions made before tooling: whether the two materials bond, whether the geometry gives the second shot somewhere to grip, and whether the finished assembly survives the loads and environment of real use.
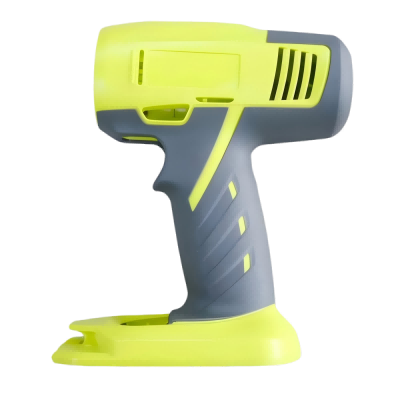
Overmold retention comes from chemical bonds and mechanical features
Two mechanisms hold an overmold to its substrate. A chemical bond forms when the overmold material is compatible with the substrate and fuses at the interface during molding; a mechanical bond forms when the overmold flows into undercuts, holes, or roughened features and locks itself in place. Most durable designs use both: a compatible pair for adhesion plus geometry that retains the overmold even if the chemical bond weakens over time or temperature.
Understanding which mechanism you are relying on changes the test plan. If the design depends on a chemical bond, surface contamination, mold temperature, and material grade all become critical; if it depends on mechanical retention, the geometry of the undercuts and holes is the spec that matters. A design that cannot say which mechanism does the work cannot be inspected or troubleshooted when parts fail in the field.
Material pairing starts from published adhesion data
The reliable route is to start from published pairing data: TPE grades are formulated to bond to specific substrates such as polypropylene, ABS, or polycarbonate, and the material supplier’s adhesion guide is the first source to check. Pair a TPE with the substrate it was designed for, in the hardness and grade the application needs, and verify with a sample rather than assuming the family name guarantees the bond.
When the required pair is not naturally compatible, do not hope that a primer or a process tweak will save it. Add mechanical retention as the primary mechanism, and test the interface under the real service conditions — including temperature, chemicals, and repeated flexing. Some “incompatible” pairs work acceptably when locked mechanically; some compatible pairs delaminate when the wrong grade is chosen or the substrate surface is contaminated by mold release.
Geometry gives the second shot somewhere to fill and grip
Geometry decides whether the second material can fill and hold. Give the overmold a consistent target thickness; knife-edge coverage tears, and thick pools cool slowly and sink. Add retention features where the bond is weakest: through-holes that the overmold can wrap around, undercuts in the substrate, or roughened/etched areas that increase contact area. Check the flow path so the second shot reaches every intended surface without weld lines or short shots.
The substrate also needs enough stiffness for the second shot. Overmolding pressure can collapse thin walls, distort cores, or push the substrate out of its insert; a substrate that is adequate for its own end use may be too flexible for the overmold process. Rib the substrate behind the overmolded area or thicken it locally, and confirm the insert and handling plan with the molder before tooling.
How do durometer and texture change the soft-touch result?
Soft-touch feel is the product of durometer, thickness, and surface texture. A low-durometer material feels soft at first touch but can tear, wear, or attract dust; a firmer material lasts longer but feels less cushioned. Texture changes perceived softness more than most engineers expect: a fine matte texture on a 60 Shore A TPE can feel softer than a smooth 40 Shore A part. Specify the durometer range, the texture, and the use case together, and validate on samples rather than by durometer alone.
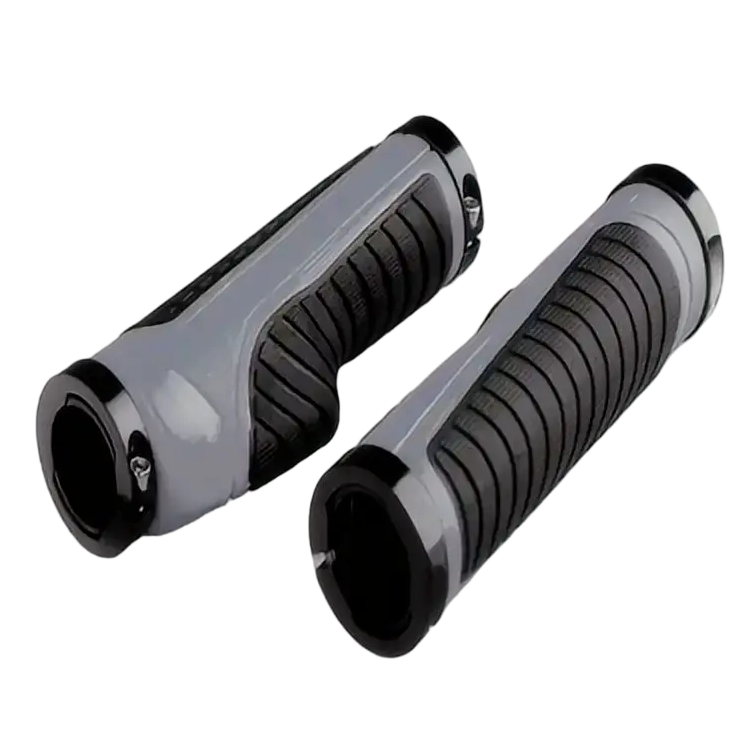
Match the specification to the real use. A tool handle experiences repeated grip and release, a wearable touches skin and chemicals, and a handheld device may be dropped. Each application stresses the interface differently, and a durometer chosen for first-feel can fail the durability test. Define the service condition before the material grade is locked.
Bond strength is verified by tests, not by appearance
Bond strength is a measured property, not a visual judgment. Pull tests, peel tests, and cyclic use tests on representative samples tell you whether the interface survives; a flat coupon result does not transfer automatically to a part with different wall thickness, flow, and surface state. Test the actual material pair, the actual substrate surface condition, and the actual geometry — and test samples from the actual mold if the bond is critical.
| Failure seen in testing | Most likely cause | Design response |
|---|---|---|
| Clean peel at interface | No chemical bond; pair incompatible or surface contaminated | Change overmold grade or add mechanical retention |
| Tear inside overmold layer | Material strength below load or thickness too thin | Increase thickness or durometer; adjust texture |
| Substrate collapses in second shot | Insufficient stiffness or support | Rib or thicken substrate; change handling |
| Edge lifts after cycling | Coverage too thin at edge or stress concentration | Increase edge thickness; add wrap-around feature |
If the bond fails, fix the mechanism, not the symptom. A different overmold grade may add the chemical bond; mechanical features may add retention; substrate surface treatment may improve adhesion. Each fix has a different cost and inspection requirement, so identify which mechanism failed before changing the tool. The overmolding service page on this site explains the process options, and the design rules above are what make a specific part succeed in them.
Overmolding is often confused with insert molding and two-shot molding, and the distinction changes the design. In two-shot molding, the substrate and the overmold are molded in sequence in the same machine or cell, so the first shot surface is fresh and the bond is strongest; in true overmolding, the substrate may be molded separately, handled, and re-inserted, so the surface can be contaminated or oxidized between shots. Insert molding places a preformed part — often metal — into the cavity and molds plastic around it. Each process sets different expectations for bond strength and geometry: a two-shot part can rely more on chemical adhesion, while a handled-substrate overmold should be designed with mechanical retention as the primary mechanism. If the supplier calls the process one name and the drawing assumes another, the bond and the cycle assumptions are misaligned. Confirm the process sequence with the molder and write it in the process note, because it determines how much of the bond the geometry must carry. Surface treatment between shots, such as flame or plasma treatment on polyolefins, can improve adhesion, but it adds a process step that must be specified and validated.
The second shot needs its own gate, vent, and flow plan, and designs that treat overmolding as “just molding again” fail at the filling stage. The overmold material must reach the far edges of the grip without weld lines or air traps, and thin coverage areas fill last and cool first, which is where short shots and knit lines appear. Gate location on the overmold tool should feed the thickest sections first and push air out through vents at the last-filled areas; the substrate geometry can block flow or create shadowed regions the second shot cannot reach. Run a flow review on the actual substrate shape before cutting the overmold tool, because the substrate is not a neutral insert — it redirects the flow and cools the overmold locally. If the overmold is a soft TPE, its lower viscosity helps filling but its low thermal conductivity lengthens cooling, and the cycle time should be validated on the real geometry rather than estimated from a flat plaque.
Frequently asked questions
Can overmolding be done on a metal insert or only plastic?
Overmolding onto metal inserts is common and behaves differently from plastic-on-plastic: the metal provides a mechanical anchor if the design adds grooves or holes, and adhesion relies on the insert’s surface preparation. Specify the insert material, finish, and retention features, because the plastic will not chemically bond to most metals the way it bonds to a compatible substrate.
What overmold thickness should a soft-touch part use?
Typical soft-touch layers range from roughly 1 to 4 mm depending on the product, but the right value is set by the feel target and the process, not by a table. Thin layers feel firm and can tear; thick layers feel soft but add cycle time and can sink. Prototype the thickness on samples and measure the feel and durability together before the tool is cut.
Can overmolded parts be recycled or reground?
Mixed-material parts are difficult to recycle because the two polymers must be separated, and regrinding an overmolded part contaminates the base material. Design for disassembly if recycling matters, or check with the material supplier whether the specific pair can be processed together. State the disposal path in the product spec when regulatory or brand requirements apply.
Conclusion
Overmolding succeeds when the design states which mechanism holds the part together, chooses a material pair from published data, and gives the second shot geometry it can fill and grip. Durometer and texture set the feel, but durability is set by the bond and the retention features. Verify on samples from the real geometry, and fix the mechanism, not the symptom, when testing fails.
If you are developing an overmolded grip, seal, or two-material part, send the substrate material, the overmold grade, and the peel or pull requirement to the 6CProto overmolding team. Confirming the pair and the retention features before tooling costs a conversation; discovering them at testing costs a tool.