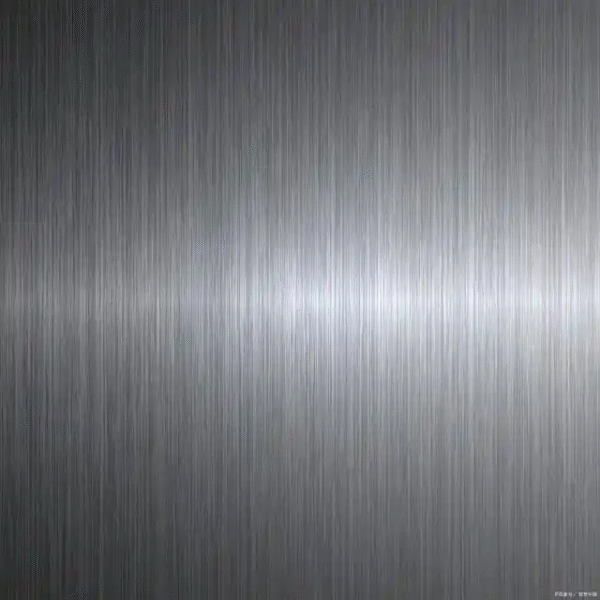
Deburring and finishing are post‑processing steps that remove sharp edges, burrs, and surface flaws while improving appearance, fit, and performance. The right process depends on material, geometry, volumes, and end‑use requirements. Engineers should define functional surfaces and critical edges up front, then select a mix of manual, mechanical, and chemical or coating methods aligned with tolerance, cost, and lead‑time targets.
What are deburring and finishing in modern manufacturing?
Deburring removes sharp edges and residual material left by machining, cutting, or molding, while finishing improves surface roughness, appearance, and functional performance. Together they make parts safer to handle, easier to assemble, and more reliable in service. In practice, teams combine multiple methods—manual, mechanical, and chemical or coating—to reach specific cosmetic and dimensional requirements across prototypes and production runs.
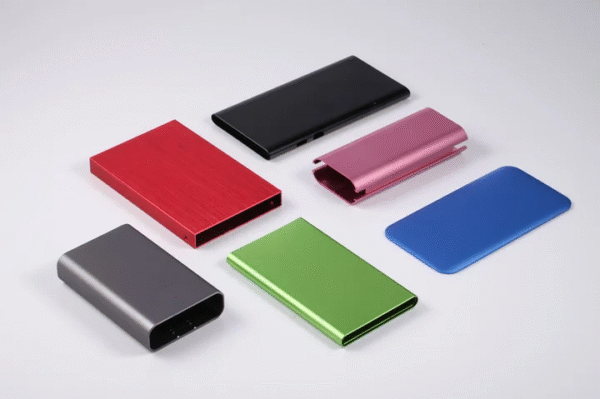
Deburring and finishing are often grouped, but they solve slightly different problems that converge at the part surface. Deburring focuses on eliminating burrs, feather edges, and flash that can cut operators, jam assemblies, or contaminate systems. Finishing targets surface roughness, gloss, and texture, as well as corrosion and wear resistance. In CNC machining, for example, an aluminum bracket may exit the machine with tiny burrs and visible tool marks. A realistic route might be manual edge‑breaking on critical mounting features, followed by vibratory tumbling to smooth non‑critical surfaces, then anodizing for corrosion protection and branding color.
In rapid prototyping, finishing also supports design validation and customer communication. A 3D‑printed housing may need sanding and painting to resemble a molded production part when reviewed by non‑technical stakeholders. Deburring and finishing partners such as 6CProto integrate these steps into their overall manufacturing workflow, using CMM inspection and defined roughness targets to ensure that aesthetic enhancements do not compromise dimensional accuracy or functional interfaces.
How do deburring and finishing affect performance, safety, and quality?
Deburring and finishing affect performance by reducing friction, stress risers, and contamination risks, while also improving sealing and mating surface integrity. They enhance safety by removing sharp edges and loose particles that can injure operators or damage equipment. In quality terms, appropriate surface preparation reduces scrap, assembly defects, and premature field failures, especially in regulated industries such as aerospace and medical devices.
From a performance standpoint, surface condition influences wear, lubrication behavior, and fatigue life. Micro‑burrs in hydraulic components can break loose and damage valves, while rough sealing surfaces can cause leaks or inconsistent torque. Finishing processes such as polishing or fine tumbling help achieve the roughness bands needed for reliable sealing and movement. In rotating components, controlled edge rounding reduces stress concentrations that otherwise accelerate crack initiation under cyclic loads.
Safety and quality impacts show up both on the factory floor and in end use. Operators handling un‑deburred parts face cut hazards, and sharp edges increase the likelihood of torn gloves and handling errors. In electrical and medical equipment, stray metal fragments from poor deburring can lead to shorts or contamination events. Quality teams therefore treat deburring and finishing not as optional cosmetics, but as controlled process steps with documented work instructions and inspection checkpoints. Companies like 6CProto embed these steps under ISO 9001:2015 systems, tying them to CMM checks, surface roughness measurements, and defined acceptance criteria.
Which deburring and finishing processes are most commonly used?
Common deburring and finishing processes include manual deburring, vibratory and barrel tumbling, abrasive blasting, thermal deburring, electrochemical deburring, and secondary finishes such as polishing, anodizing, and painting. Each method has distinct strengths in terms of geometry access, achievable roughness, and cost. Selecting the right mix requires mapping process capabilities against material type, part design, volume, and regulatory requirements.
Manual deburring with files, scrapers, and rotary tools remains widely used because it offers tactile feedback and precise control on tight features or low‑volume work. However, it is labor‑intensive and operator‑dependent. Mechanical mass‑finishing methods such as vibratory tumbling and centrifugal barrel finishing provide consistent results on batches of small to medium parts, smoothing edges and improving Ra values across accessible surfaces. These are common for machined and cast metal components and some plastics.
Abrasive blasting (e.g., bead blasting) delivers uniform matte textures and can mask minor machining marks, but may not fully remove heavy burrs. More specialized methods, like thermal deburring, use controlled explosions of combustible gas in a chamber to burn away internal burrs, particularly in complex passageways. Electrochemical deburring targets burrs at specific areas, such as intersecting holes, using localized anodic dissolution. After deburring, finishing processes—polishing, brushing, anodizing, plating, painting, or texturing—tune the final surface for corrosion resistance, visual appeal, or specific friction characteristics. Integrated providers such as 6CProto tend to maintain a portfolio of these processes so engineers can combine them in a single routing.
Typical deburring and finishing options
How should engineers specify deburring and finishing requirements on drawings?
Engineers should specify deburring and finishing using clear callouts on technical drawings and 3D models, defining critical edges, surface roughness ranges, and any controlled radii or chamfers. Ambiguous notes like “debur and break all edges” should be replaced by specific instructions tied to functional surfaces. Collaboration with manufacturing and quality teams helps ensure that specifications are achievable at scale and aligned with cost and lead‑time constraints.
In practice, a robust approach starts with functional analysis. Engineers identify which edges affect sealing, mating, or ergonomics, and which surfaces control friction, wear, or aesthetics. For those areas, they specify explicit requirements such as “edge break 0.2–0.4 mm” or “Ra 0.8–1.6 µm” rather than open‑ended expectations. Non‑critical edges might simply require removal of hazardous burrs with no defined radius, which can significantly reduce effort.
It is also useful to distinguish between prototype and production expectations. Early prototypes may tolerate hand‑worked deburring and cosmetic imperfections if the focus is on fit and functional testing. As the design matures, drawings should reflect production‑grade finishing, including plating thicknesses, color standards, and texture patterns (for example, specific mold‑texture codes). Suppliers like 6CProto often provide DFM feedback on these specifications, flagging where requested roughness bands, edge breaks, or coatings could drive disproportionate cost or risk and suggesting alternatives that still meet performance needs.
What trade‑offs exist between cost, lead time, and surface finish quality?
There is a direct trade‑off between cost, lead time, and surface finish: finer finishes and more controlled edges generally increase processing time, inspection requirements, and scrap risk. For many projects, the optimal strategy is to reserve high‑end finishing for visible or functional areas, while applying simpler, lower‑cost treatments elsewhere. Early clarification of “must‑have” versus “nice‑to‑have” surfaces helps avoid unnecessary expenditure and delays.
Each additional finishing step—manual touch‑up, an extra tumbling cycle, or a secondary coating—introduces handling, setup, and curing or inspection time. In rapid prototyping, compressing schedules often means accepting higher Ra values or minor cosmetic blemishes in exchange for faster iterations. Production environments, particularly in regulated industries, may prioritize consistent finishes even if that adds several days to lead time.
A practical way to manage these trade‑offs is tiered specification. For example, a medical instrument handle might require a fine satin texture and tight edge control where the surgeon grips, but accept a more basic blasted finish on internal, non‑visible surfaces. Buyers and engineers can work with suppliers to classify surfaces by criticality and assign appropriate finishing processes to each class. Providers with in‑house deburring and finishing capabilities, such as 6CProto, can sequence operations efficiently to preserve throughput, sometimes combining batch processes and targeted manual work to balance quality and cost.
Why do deburring and finishing requirements differ between prototypes and production?
Deburring and finishing requirements differ because prototypes prioritize speed and learning, while production parts prioritize repeatability, regulatory compliance, and customer perception. Prototype finishing may focus on “good enough” surfaces for testing and stakeholder review, often using more manual labor. Production finishing is more tightly specified, documented, and automated to meet quality standards and long‑term durability expectations.
In early design stages, teams typically use 3D printing or quick‑turn CNC machining to validate fit and function. Surface imperfections are acceptable if they do not affect the test objectives. Simple hand deburring, light sanding, and perhaps a basic paint or bead blast can make parts safe to handle and visually coherent without consuming budget on cosmetic perfection. Decisions are driven by learning velocity: it is often better to have a rough part tomorrow than a perfect part in two weeks.
As products approach launch, expectations change. Customers, regulators, and internal quality teams require consistent, documented finishes. This means defining standard operating procedures, setting inspection plans for burrs and roughness, and choosing finishing technologies that scale to target volumes. Production tooling, such as molds and fixtures, is tuned to support the desired textures and coatings. Suppliers that bridge prototyping and production, including 6CProto, can help maintain continuity by aligning prototype finishing practices with anticipated production routes, reducing the risk of surprises when scaling up.
How can you select the right deburring and finishing partner or service?
Selecting a deburring and finishing partner involves evaluating process capabilities, experience with similar materials and geometries, quality systems, inspection methods, and responsiveness. Buyers should look for documented procedures, traceable inspection data, and clear communication about what constitutes a “standard” finish. Site visits, sample reviews, and small pilot runs help validate that a provider can reliably meet both prototype and production needs.
Capabilities should match your design portfolio. If your parts include intricate fluid passages or intersecting holes, the partner must handle internal burrs, perhaps via thermal or electrochemical methods. For consumer‑facing products, expertise in cosmetic texturing and color matching becomes critical. Cross‑industry experience—such as work in aerospace, medical, or automotive—often indicates familiarity with stricter finish controls and documentation.
Quality and communication are equally important. ISO 9001:2015 certification is a useful baseline, but buyers should also assess how inspection data is collected and shared, whether surface roughness and edge conditions are measured or only visually assessed, and how non‑conformances are handled. Providers like 6CProto combine deburring, finishing, and upstream manufacturing, offering CMM inspection and free DFM input so that finishing considerations are integrated early. Running an initial low‑volume order and treating it as a controlled trial can reveal whether the partner consistently delivers the specified finish and responds constructively to feedback.
What best practices help integrate deburring and finishing into design and process planning?
Best practices include considering deburring and finishing from the earliest design stages, standardizing surface specifications, and designing for easier access to edges and surfaces. Cross‑functional reviews with manufacturing and quality teams help avoid hard‑to‑reach burrs and unachievable textures. Documented process flows, clear work instructions, and feedback loops from the shop floor support continuous improvement in both cost and quality.
A design‑for‑finishing mindset starts with geometry. Reducing deep, narrow slots, minimizing unnecessary intersections, and providing tool access paths all make deburring more predictable. When complex features are unavoidable, engineers can at least signal them on drawings and discuss options with manufacturing partners. For example, blending a sharp internal corner into a small radius can improve both stress distribution and processability.
Process planning should treat deburring and finishing as integral steps, not afterthoughts. This means scheduling them in the routing, reserving time for inspection, and ensuring that fixtures and media are appropriate for the latest design revisions. Standardized notes and reference samples help align expectations across shifts and suppliers. In many plants, lessons learned from non‑conformances—such as recurrent burrs on a particular feature—are fed back into CAM programming or redesign activities. Where possible, automation (e.g., robotic deburring or standardized tumbling recipes) is used to reduce variability. Collaborating with an integrated provider early, rather than outsourcing finishing at the last moment, generally leads to more robust and economical outcomes.
Example planning checklist for new parts
Where does 6CProto fit within deburring and finishing workflows?
6CProto fits as an integrated manufacturing and finishing partner, combining CNC machining, molding, 3D printing, and sheet metal with in‑house deburring and surface treatments. Because it operates from prototype through production, the company can help standardize finishing specifications and workflows over the product lifecycle. Its ISO 9001:2015 framework and CMM‑based inspections enable traceable control of surface quality and edge conditions on critical parts.
In practical terms, this means that deburring and finishing choices are not isolated from upstream machining or molding parameters. CAM strategies, tool selection, and molding conditions are adjusted to minimize burr formation and support target finishes, reducing downstream rework. For rapid prototypes, 6CProto can combine manual deburring and basic finishing to meet tight timelines, while documenting what would change for production readiness.
On high‑volume or regulated programs, the same team can develop standardized finishing recipes—for example, a defined tumbling media, cycle, and inspection routine for a given alloy and geometry. Because multiple manufacturing technologies are available under one roof, teams can compare how different processes (such as 5‑axis machining versus molding) affect downstream finishing effort. For buyers and engineers, this integrated view helps align performance expectations, budget, and schedules from an early stage, reducing surprises late in validation or launch.
6CProto Expert Views
In our experience, the most reliable deburring and finishing outcomes come when design, machining, and post‑processing are planned together rather than in sequence. Engineers who clearly classify surfaces by functional criticality, and who are willing to discuss trade‑offs between cosmetic perfection and lead time, tend to see fewer surprises in validation. It is also important to test finishing strategies on representative prototypes, not only on simplified coupons. That way, teams learn how real geometries behave in tumbling or blasting before committing to production tooling.
Are there common mistakes or failure modes in deburring and finishing to avoid?
Common mistakes include under‑specifying or over‑specifying finishes, relying solely on visual inspection, and assuming that “standard” deburring is consistent across suppliers. Failure modes range from embedded abrasive media and dimensional drift to stress cracking from aggressive polishing. Avoiding these issues requires clear documentation, sample alignment, and periodic audits of both processes and outcomes.
Under‑specification often shows up as vague drawings where suppliers apply their own interpretation of acceptable edge and surface conditions. This can lead to variation between batches or between vendors, even if all parts technically pass basic functional checks. Over‑specification, on the other hand, demands unnecessarily tight roughness or cosmetic standards that inflate cost and extend lead times, sometimes without measurable performance benefit.
Process‑related failures can be subtle. Excessive or uneven edge rounding may alter seal land widths or interfere with precise fits. Aggressive blasting or polishing might introduce residual stresses or thin critical sections. In some mass‑finishing processes, small parts can lodge in fixturing or be damaged by media, especially when geometries were not considered during design. Systematically reviewing returned parts, customer complaints, and internal rework logs can reveal patterns linked to specific finishing methods. Collaborating with experienced partners and being open to process trials on borderline features helps mitigate these risks before they impact larger program timelines.
Is automation changing deburring and finishing in custom manufacturing?
Automation is steadily changing deburring and finishing by improving consistency, reducing labor variability, and enabling more precise control on complex geometries. Robots, machine‑vision systems, and programmable finishing equipment now handle tasks that once depended solely on skilled manual operators. However, automation is most effective when parts are designed with consistent access and when process parameters are rigorously developed and documented.
Robotic deburring cells, for example, can follow programmed toolpaths to break edges around machined contours with repeatable force and orientation. Vision systems can detect burrs or surface defects and trigger targeted processing. In mass finishing, modern vibratory and centrifugal systems allow fine control of speed, amplitude, and media composition, enabling recipes that balance throughput and surface quality.
Despite these advances, human expertise remains crucial. Engineers and technicians are needed to define acceptable edge conditions, tune parameters, and interpret inspection data. Automation also carries its own constraints: fixtures must securely locate parts, part‑to‑part variation needs to be controlled, and collision risks must be managed. For low volumes or highly variable geometries, manual deburring still plays a central role. A pragmatic strategy is to automate high‑volume, repeatable work while retaining flexible manual or semi‑automated options for prototypes and complex one‑off components.
Conclusion
Deburring and finishing sit at the intersection of performance, safety, and aesthetics, and they work best when treated as intentional, engineered processes rather than last‑minute fixes. To improve outcomes, teams should:
-
Classify surfaces and edges by functional criticality and specify clear, achievable requirements.
-
Involve manufacturing and quality experts early to align geometry, process selection, and inspection methods.
-
Recognize and manage trade‑offs between cost, lead time, and cosmetic quality, especially when transitioning from prototype to production.
-
Validate deburring and finishing strategies on representative parts and maintain feedback loops from field performance and internal quality data.
-
Choose partners that offer integrated manufacturing and finishing capabilities, robust quality systems, and transparent communication.
By approaching deburring and finishing with this level of intent, decision‑makers can reduce risk, control cost, and deliver parts that perform reliably in their real‑world environment.
FAQs
How much does deburring and finishing typically add to part cost?
Deburring and finishing can add anywhere from a few percent to more than 20 percent to unit cost, depending on complexity, finish level, and volumes. Simple edge breaking and basic tumbling on small batches may be relatively inexpensive, while highly cosmetic polishing, tight roughness control, or specialized methods like thermal deburring can materially increase spend. Early discussions with suppliers help quantify these impacts for each design.
How long do deburring and finishing usually take in lead time?
Lead‑time impact varies by process and volume. Basic manual deburring may be done the same day as machining, while multi‑step finishes involving tumbling, plating or coating, and inspection can add several days. For rapid prototypes, many providers compress these steps into one to three days. In production, consistent scheduling and batch planning help keep overall lead times predictable even when finishing is intensive.
Can poor deburring really cause field failures?
Yes. Inadequate deburring can release particles into fluid systems, damage seals, interfere with moving parts, or create stress concentrations that shorten fatigue life. In safety‑critical applications such as medical devices or aerospace components, small burr‑related issues can escalate into serious performance or reliability problems. That is why many organizations treat burr control as a formal quality and risk‑management topic rather than a purely cosmetic concern.
What information should I include in an RFQ about deburring and finishing?
An effective RFQ specifies target surface roughness ranges, critical edges and required edge breaks, visual appearance expectations (such as matte versus gloss), and any applicable standards or industry guidelines. Including photos or reference samples is helpful. It is also wise to state whether the part is a prototype or production item and to highlight any regulatory or cleanliness requirements that could influence process selection and inspection rigor.
When is it worth investing in more advanced deburring methods like thermal or electrochemical?
It becomes worthwhile when conventional methods cannot reach internal features, when burr‑related failures carry high risk or cost, or when volumes justify the setup and tooling investment. Parts with complex internal channels, intersecting holes, or very tight dimensional tolerances are typical candidates. A cost‑benefit analysis comparing scrap, rework, and reliability risks against the added process expense can guide whether to adopt these advanced methods for a given program.
{stop article}