

Thread a screw into a 0.8 mm galvanized panel and the result is usually the same: one or two good turns, then a stripped hole that spins under torque. Hardware insertion exists to remove that failure mode. It installs a threaded or structural insert into thin sheet so the part gains a durable, repeatable mounting point without relying on the base material to hold machine threads. The controlled process—choose the insert, size the hole, set the tooling, and verify retention—turns a weak zone in the sheet into the most reliable feature on the assembly.
The Core Idea: Replace Tapped Threads with Engineered Anchor Points
Hardware insertion is the permanent or semi-permanent installation of nuts, studs, standoffs, rivet-style inserts, or press-fit fasteners into a sheet-metal part so that screws can engage reliably. In fabrication terms, it answers a design question: this enclosure, bracket, or panel needs to be assembled, serviced, and re-assembled—how will the threads survive that cycle? The common engineering answer is to stop asking thin sheet to hold a thread and instead give the thread to a piece of hardware that the sheet anchors mechanically.
The comparison matters because the alternatives each cost something. Tapping thin material provides only one to three threads of engagement, which strips quickly when a screw is driven repeatedly or overtightened. Welding a nut or boss onto the sheet adds heat, which can distort thin panels, damage coatings, and force a rework cycle of grinding and repainting. Adhesive-bonded hardware works for light loads but leaves cure time, surface-prep, and shear-strength questions. Inserted hardware sidesteps those trade-offs: the sheet stays undistorted, the finish survives, and the thread is a controlled component instead of an accident of the base metal. That is why insertion becomes part of the design strategy in enclosures, brackets, frames, and electronics housings rather than a shop-floor afterthought. For a sheet metal fabrication program, the insertion step is usually specified alongside the bending and punching operations so the hole geometry and the press access stay consistent from the start.
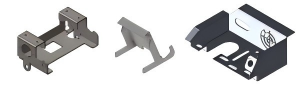
Which Hardware Types Are Common—and Which Fits Your Part?
Choosing the insert family is the first real decision, because each type trades strength, serviceability, and installation complexity differently. The table below summarizes what a sheet-metal buyer is actually choosing between.
| Hardware type | Typical use | Main advantage | Common caution |
|---|---|---|---|
| Nuts (incl. self-clinching) | Threaded attachment in thin sheet | Strong, reusable thread | Requires correct hole size and clinch force |
| Studs | Fixed protruding mount points | Fast mating during assembly | Must suit load direction |
| Standoffs | PCB spacing and panel separation | Creates a controlled gap | Needs enough surrounding material |
| Threaded inserts | Thread reinforcement in hybrid parts | Improves thread durability | Material compatibility matters |
| Captive fasteners | Service panels and access covers | Reduces loose-part risk | More complex installation |
For sheet metal, self-clinching hardware is the workhorse because it forms a mechanical lock in a single press operation, and the material and testing references behind the selection follow ASTM fastener and materials standards. The deciding question is how the part will be handled after fabrication. A panel that is assembled once and never touched again can get away with a modest thread. A field-replaceable access cover that will be opened dozens of times needs stricter retention, which means the supplier must be able to verify torque-out and pull-out performance rather than assume the press cycle produced it.
How Parts Should Be Designed for Insertion
Good insertion design starts before the hole is cut. Four dimensions dominate the outcome: hole diameter, edge distance, sheet thickness, and tool access. An oversized hole lets the insert spin or pull out; an undersized hole forces the installation to deform the sheet around the fastener. Inserting too close to a bend line or embossed feature risks distorting the formed geometry, while a fastener placed in a tight corner can become unreachable by the press head, anvil, or support fixture.
A useful rule is to design for the insertion tool as well as the fastener — and to apply the same standards-and-tolerances discipline to the hole as to any machined feature on the part. The engineering team should ask whether a press head and back-up support can reach the location without interference, and whether the surrounding sheet stays flat during the clinch. A practical design review covers: hole diameter against the hardware supplier’s specification; clearance from edges, bends, and formed features; sheet thickness compatible with the selected fastener; coating or plating that might shift fit beyond tolerance; and load direction so the insert is not stressed in its weakest orientation. A control enclosure with internal brackets is the classic failure case—the CAD model looks fine, but once bends are added, a threaded insert becomes unreachable. Catching that in a DFM review is far cheaper than discovering it at first-article inspection, which is exactly why the free DFM analysis offered with a 6CProto quote is the checkpoint that surfaces these issues before tooling is committed; the same review is covered in the DFM checklist for CNC machining.
Beyond the fastener itself, the assembly logic of the part decides the retention target. The number of assembly and disassembly cycles, the screw torque spec, and the risk of an operator cross-threading all matter: a high-strength insert that is difficult to install is wrong for a high-volume panel line, while a soft, fast-clinching fastener can be wrong for a part re-torqued in the field.
Torque-out and pull-out testing are the objective evidence behind those decisions. These tests measure whether the installed hardware can resist spinning free or being pulled out under load, and they are indispensable for parts that will be assembled, disassembled, or stressed during service. For load-bearing inserts, the supplier should be able to state the expected pull-out force for the sheet thickness and alloy being used, and to run the test on production-representative samples rather than on datasheet values. The test result is what converts “we install hardware” into “we install hardware that holds to a defined load.”
When Insertion Happens: Before or After Finishing
Timing is a finish decision as much as a mechanical one. Inserting before coating lets the finish cover the entire assembly and keeps corrosion protection continuous, but threads may need masking to stay clean and functional. Inserting after finishing protects thread cleanliness and avoids coating buildup inside the threads, yet the coating around the insertion zone can crack or chip under the press load. Corrosion risk, cosmetic requirements, and thread cleanliness decide the sequence. Buyers should ask the supplier which order gives the most reliable result for their material and finish stack-up instead of assuming the fastener can simply be installed last.
The press operation itself deserves the same attention as the finish sequence. A controlled process checks hole condition before installation, verifies the insert seats completely, and inspects for sheet distortion or incomplete clinching. For load-bearing parts, quality teams go beyond visual checks and run torque-out or push-out tests, because those tests reveal whether the insert resists spinning or being pulled free under real assembly and service loads. Suppliers that treat insertion as a measured process—tracking tool setup, confirming hole size, and using coordinate measuring machines on critical dimensions—are the ones that can make a prototype behave like a production part.
Beyond the fastener itself, the assembly logic of the part decides the retention target. The number of assembly and disassembly cycles, the screw torque spec, and the risk of an operator cross-threading all matter: a high-strength insert that is difficult to install is wrong for a high-volume panel line, while a soft, fast-clinching fastener can be wrong for a part re-torqued in the field.
Torque-out and pull-out testing are the objective evidence behind those decisions: they measure whether installed hardware resists spinning free or being pulled out under load. For load-bearing inserts, the supplier should state the expected pull-out force for the sheet thickness and alloy, and run the test on production-representative samples rather than datasheet values—converting "we install hardware" into "we install hardware that holds to a defined load."
Automation: Match the Investment to the Run
Automation earns its keep when a job contains many identical parts or several insertion points per part. Feed systems, press controls, and part detection keep cycle times consistent, reduce handling, and lower the chance of a missed fastener. But automation is not automatically better. Small prototype runs, frequent design changes, and highly mixed part families can stay more efficient with semi-manual insertion, where a skilled operator changes over quickly and inspects as they go. The decision is one of matching tooling investment to expected volume and change rate—not a blanket endorsement of the most automated line.
What Buyers Should Ask Before Approving the Job
Buyers tend to open with price, but hardware insertion quality is decided by process control and compatibility. The questions that matter are: what hardware brands or standards does the supplier support; how is torque-out or pull-out performance verified; what hole tolerances are acceptable; can insertion happen before or after finishing; what inspection protects critical parts; and how quickly can a DFM review return? For parts that will be assembled, disassembled, or stressed in service, the answers to these questions separate a supplier that owns the process from one that merely rents a press.
Common Mistakes and How to Avoid Them
Most insertion failures trace back to a handful of recurring errors: oversizing the hole, ignoring edge distance, selecting incompatible hardware, and assuming every finish behaves the same. A frequent fifth problem is trying to insert hardware into a feature the press tool cannot reach. These issues tend to surface late, after tooling or finishing decisions are locked. Teams also underestimate how much small dimensional changes matter—a design that holds up in early prototypes can behave differently after coating, material substitution, or a forming change, which is why a real production-style test beats trusting the CAD model alone.
FAQs
What materials work best for hardware insertion?
Sheet metal is the most common host, but the best material depends on the fastener type and installation method. Compatibility, hardness, thickness, and finish all influence whether the hardware will hold correctly over its service life.
Can hardware insertion be used on painted or coated parts?
Yes, but the sequence matters. Inserting before coating protects finish continuity but may require thread masking, while inserting after coating keeps threads clean but risks coating damage around the hole.
Is hardware insertion stronger than tapping?
In thin material, usually yes. Tapping fails quickly when thread engagement is short, while inserted hardware creates a more durable connection for repeated assembly and service cycles.
How do I know if my design is ready for insertion?
Check hole size, edge distance, tool access, sheet thickness, and coating effects. A DFM review is the safest way to catch problems before production starts.