

Anodizing reads like a single operation on a purchase order, but it is a sequence of wet processes with a different effect at each stage. Knowing the sequence explains the lead time, the colour variation and the dimensional change that catches designers out.
The sequence, stage by stage
The part is first cleaned to remove oils and handling contamination, because the layer grows from the surface and a contaminated surface produces a patchy result. It is then etched, which removes a thin layer of metal and creates a uniform matte base; parts that must stay bright skip or reduce this step. A desmut removes the residue left by etching. Anodizing follows in an acid electrolyte with the part as the anode, and the oxide layer grows. If colour is required, dye is absorbed into the porous layer, and finally the part is sealed to close the pores.
| Stage | Effect on the part | Consequence to plan for |
|---|---|---|
| Cleaning | Removes oils and residue | Skipping it causes patchy appearance |
| Etching | Uniform matte surface; removes a thin layer | Slight material removal before the layer grows |
| Anodizing | Oxide layer forms from the base metal | Dimensions grow; bores and threads need allowance |
| Dyeing | Colour enters the porous layer | Shade depends on alloy, thickness and dye batch |
| Sealing | Closes the pores | Affects colour stability and corrosion resistance |
What determines the layer thickness
Current density, time, bath temperature and the alloy.
Thickness is the product of how much current is applied, for how long, under what bath conditions, and how the specific alloy responds. Two parts in the same bath will not necessarily grow the same layer if they are different alloys, which is why anodizing specifications name the material as well as the thickness class. The layer grows both outward and into the metal, so the finished dimension depends on the class chosen rather than on the bath alone.
That has a practical consequence for anyone specifying a fit. A slot that must accept a mating component has to allow for the growth on both faces, and a thread must be sized for the condition it will be measured in. Where a critical dimension exists, the drawing should state whether the tolerance applies before or after anodizing, because that single note prevents most rework on anodized parts.
What is a drawback of anodizing?
It changes dimensions, and colour is hard to match.
The two drawbacks that cause the most trouble are dimensional and cosmetic. The layer grows from the surface, so tight fits must be designed around it, and a part already machined to final size may no longer assemble after treatment. Colour depends on the alloy, the layer thickness and the dye, so parts from different batches can differ subtly even when the same nominal colour was specified, and rework is not possible: an anodized surface cannot be spot-repaired, only stripped and re-run.
Two further limitations are worth knowing. Anodizing only works on aluminium, so a mixed-material assembly must be treated part by part before assembly. And the process consumes the base metal at the surface, which means a heavily etched finish removes material rather than adding it, so a part with a fine surface requirement needs its pre-treatment considered alongside the anodizing itself.
How long the process takes
The anodizing bath itself is measured in tens of minutes for common decorative classes, with longer runs for heavier layers. The elapsed time for a job is longer, because cleaning, etching, dyeing and sealing each take their share, and because parts are racked together in batches rather than processed individually. Racking is also a design consideration: a part needs a contact point to carry current, and that contact leaves an uncoated mark somewhere on the component, which is why rack marks are usually placed on a hidden face by agreement.
Two consequences follow for planning. Small parts are often batched with others, so the lead time reflects when a suitable run is available rather than the duration of a single part. And any masking of features that must stay bare adds handling before the bath and removal afterwards, which affects both lead time and cost.
Sealing, and why it decides how the finish performs
The porous structure that accepts dye is also a vulnerability, which is why sealing follows. The sealed layer retains colour, resists staining and provides the corrosion resistance the finish is chosen for. Sealing quality is affected by water chemistry and temperature, so it is a controlled process step rather than a rinse, and it is one of the reasons anodizing is a specialist operation rather than a simple dip.
For inspection purposes, sealing quality and layer thickness together determine whether the finish will hold up in service. Appearance checks alone will pass a part whose pores never closed properly. Coating classifications and test methods are published by ASTM Committee B08, material behaviour references by ASM International, and manufacturing practice guidance by the NIST Manufacturing Extension Partnership.
How to specify an anodized part so it works
Name the alloy, the anodizing type and thickness class, the colour standard with a physical reference sample, the surfaces to be masked, where rack contact is permitted, and the condition at which dimensional tolerances apply. That list covers everything that commonly goes wrong, and most of it is a matter of stating intent rather than adding requirements.
It also helps to decide whether the finish is functional or cosmetic, because the two lead to different process emphasis. A wear surface on a sliding component needs the harder class and attention to edge radii, while a visible housing needs colour consistency and control of the cosmetic surfaces. Drawing conventions follow ASME standards, bath and waste obligations are set out by the US EPA, and the related conversion and coating alternatives are described under surface finishing and surface finish guides.
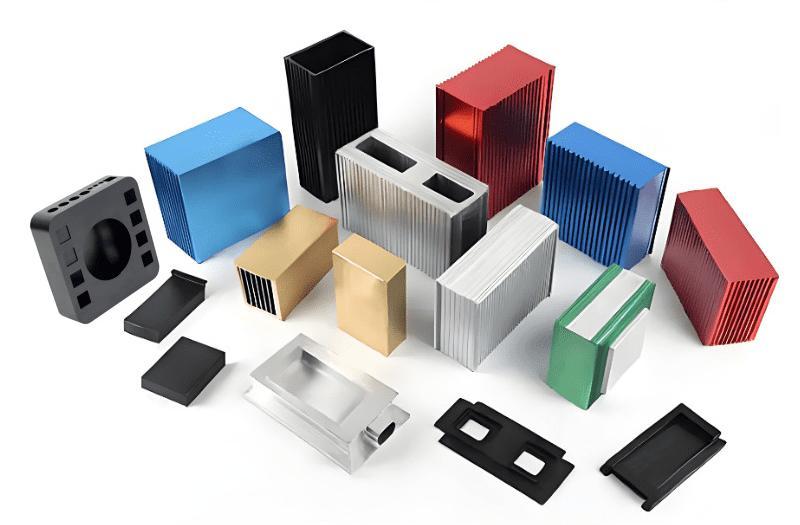
Send the part with the alloy, the class and a colour sample, and request an anodizing quote with masking and rack contact points agreed.
FAQ
What is a drawback of anodizing?
It changes the part’s dimensions because the layer grows from the surface, and colour is difficult to match across alloys and batches. It also cannot be spot-repaired, so a damaged surface has to be stripped and re-anodized.
How long does the anodizing process take?
The bath itself takes tens of minutes for common decorative classes, with longer runs for heavier layers. The elapsed job time is longer, since cleaning, etching, dyeing and sealing each take time and parts are processed in racks.
What determines the layer thickness?
Current density, time, bath temperature and the alloy. Two different alloys in the same bath will not necessarily grow the same layer, which is why the specification names the material as well as the thickness class.