

Overmolding technology combines a rigid substrate with a softer overmold layer in a single integrated process to create durable, ergonomic, soft-touch grips used in consumer electronics and tools. By eliminating secondary assembly, it cuts cost, improves reliability, and allows complex geometries, color accents, and sealing features that are difficult or impossible with single-material molding.
Last updated:
What is overmolding technology in multi-material molding?
Overmolding is an injection molding process where a rigid substrate is partially or fully covered with a second, softer material in one controlled sequence, creating a unified multi-material part with enhanced grip, comfort, and functionality. It is widely used for soft-touch grips, seals, and impact protection in consumer electronics, power tools, and medical devices.
From a manufacturing perspective, overmolding is not just “adding a soft layer” but designing a bonding system between two materials and two process windows. In practice, we treat the substrate shot as a precision insert, controlling its shrink, surface finish, and temperature at transfer. The second shot must then fill without warping the first, which is why mold designers at 6CProto obsess over gate orientation, cooling symmetry, and localized venting in the grip zones.
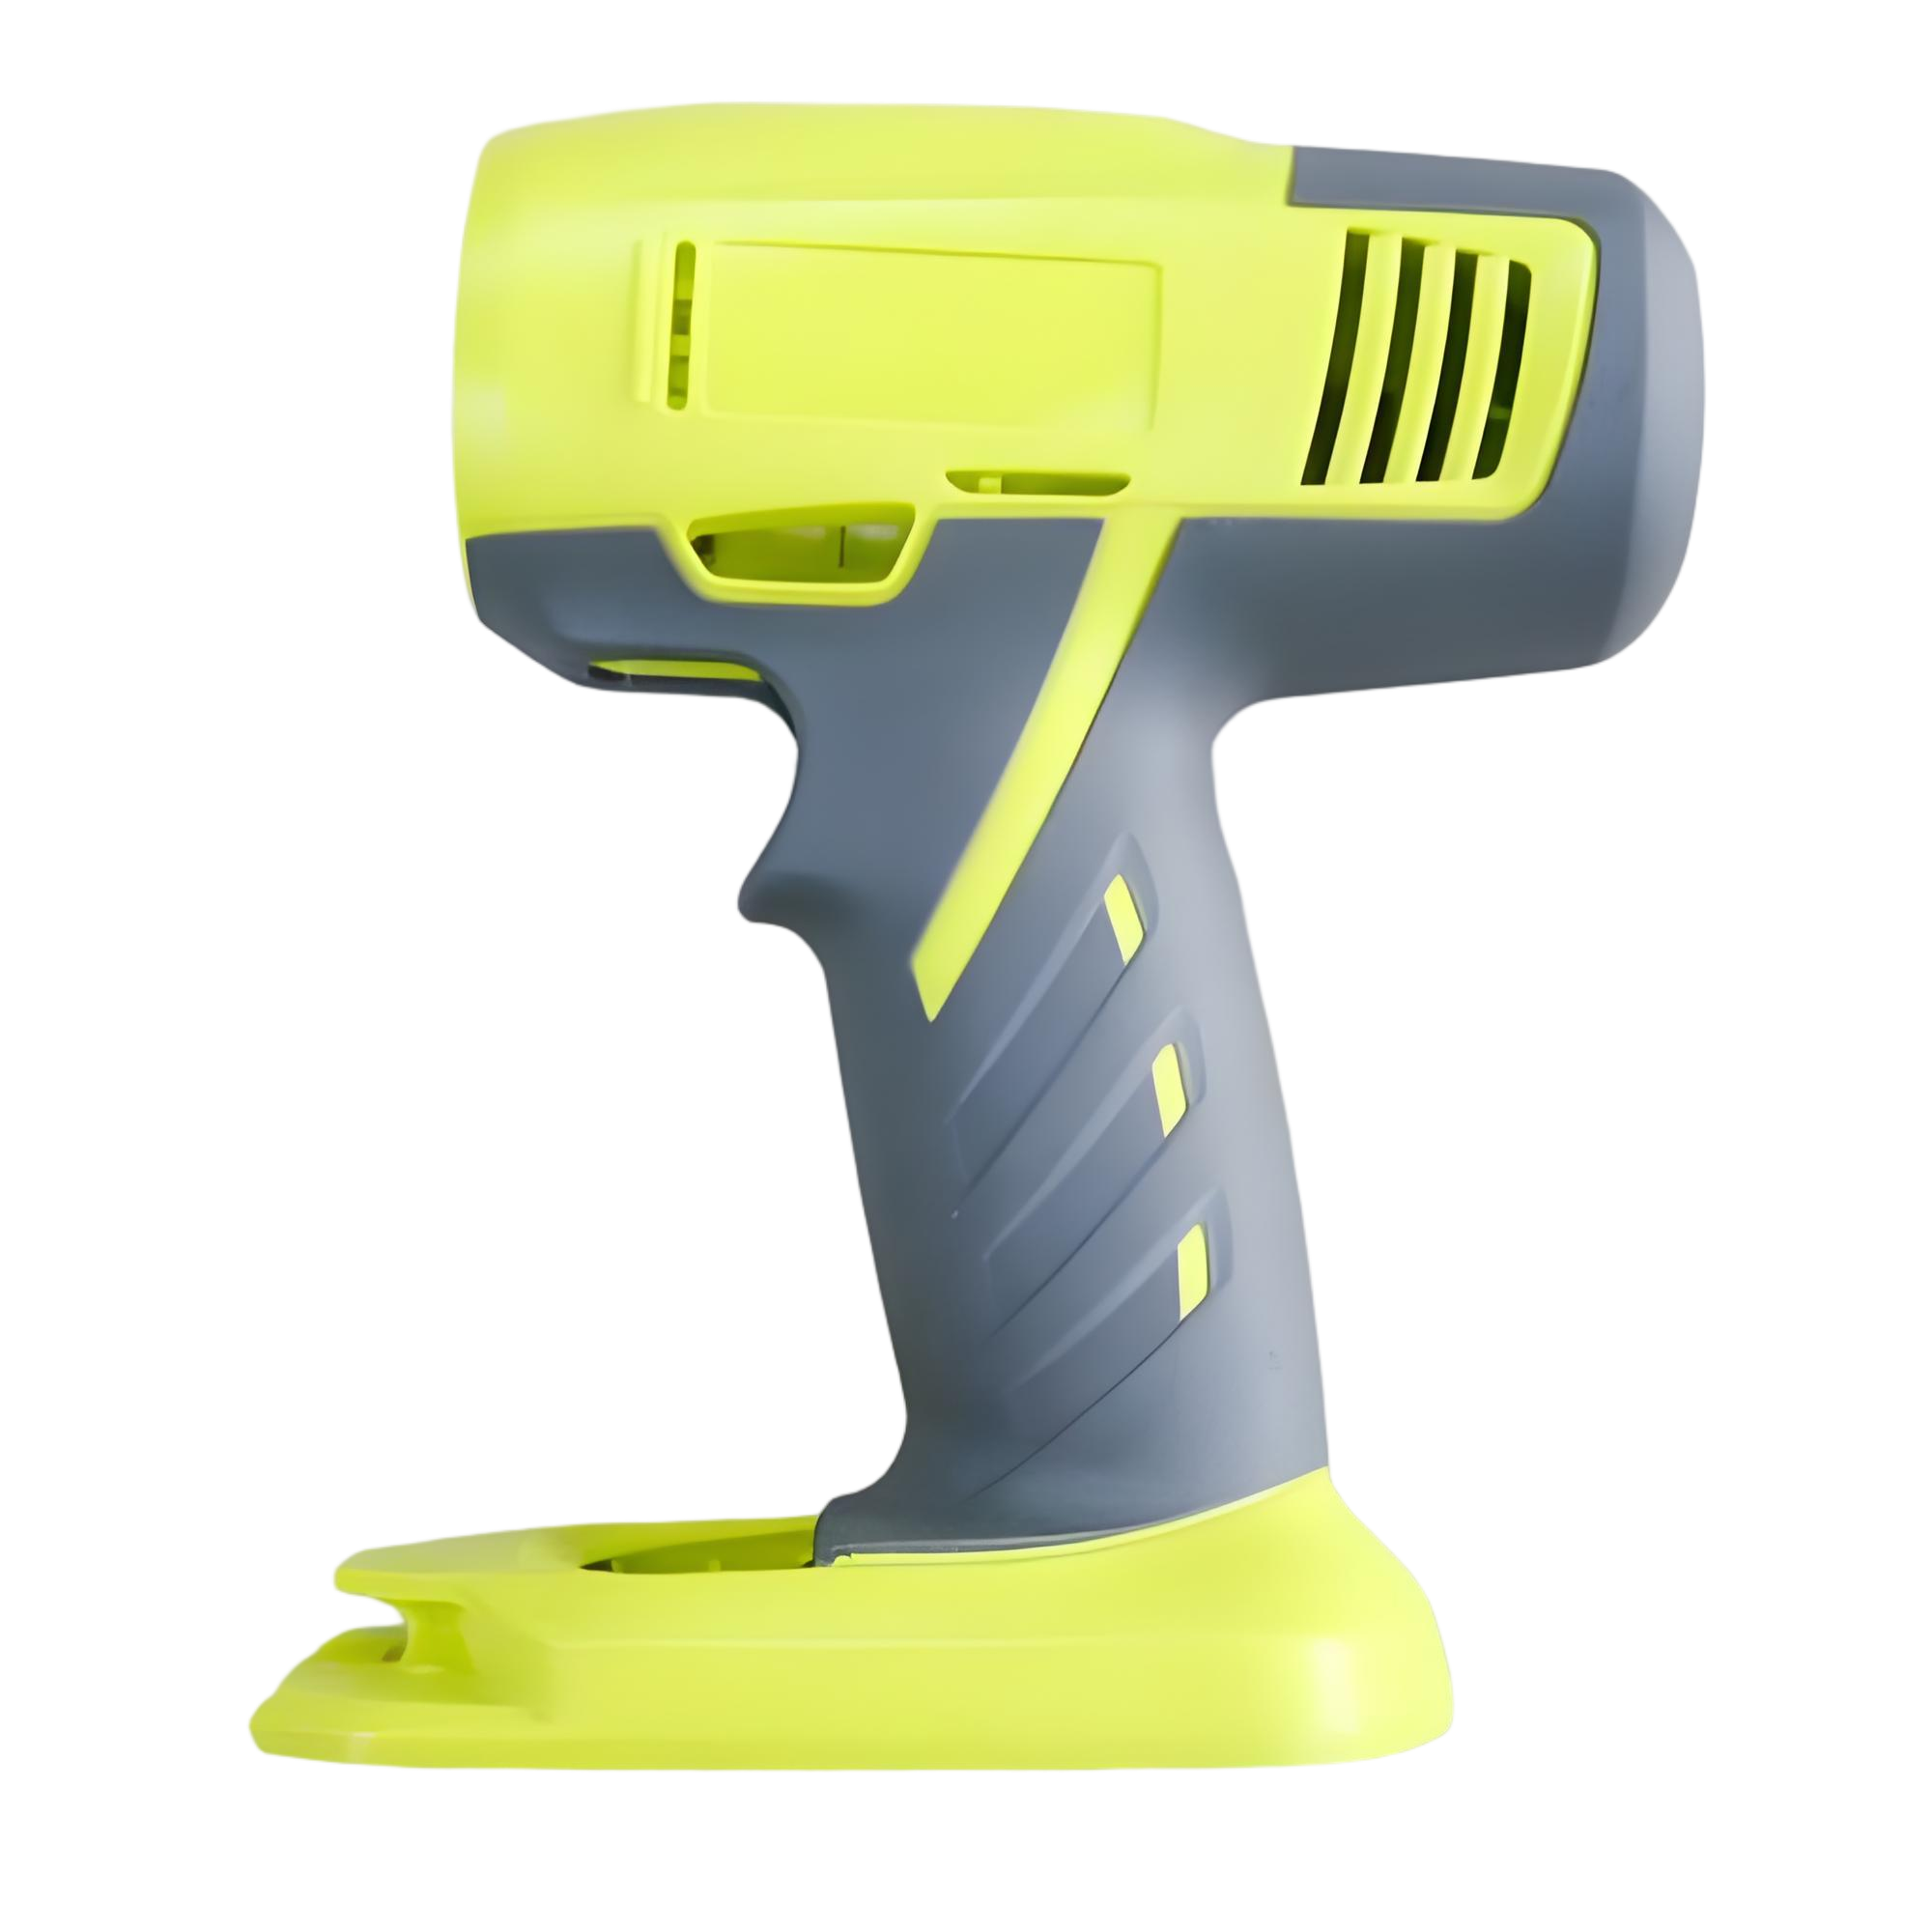
When I review an overmolded handle, I do not start with aesthetics; I start with how the load transfers from the user’s fingers, through the soft TPE, into the hard backbone. That load path dictates wall thickness, ribs, and where we can safely “thin out” the overmold without risking delamination. Done correctly, overmolding delivers the feel of a rubber grip with the structural integrity of a metal or engineering-plastic core.
How does overmolding work step by step in production?
Overmolding works by first molding or placing a rigid substrate, then injecting a softer material over it in a second shot, where heat and pressure create chemical or mechanical bonding, producing a single integrated part without separate assembly. Tooling and process parameters are tuned so both materials cool and shrink compatibly, preventing warpage or delamination.
On the shop floor, I break the process into four controllable stages: substrate stability, surface readiness, interface filling, and joint cooling. Substrate stability means the first shot or insert is dimensionally locked; if its shrink isn’t predictable, the second shot will flash or short. Surface readiness covers cleanliness and texture: we often specify an EDM or bead-blast finish on bonding regions to increase surface area and mechanical keying.
At the interface, balanced hot runners and well-placed gates are critical. On soft-touch grips, I prefer to gate into hidden regions (like undercuts or interior ribs) so weld lines never appear in high-contact zones. Finally, cooling is deliberately asymmetrical: softer TPE needs different cooling than a thick PC or PA core, so we design separate conformal circuits to manage both without over-stressing the bond.
Which materials are best for soft-touch overmolding grips?
The best material combinations for soft-touch grips pair a rigid core like PC, ABS, PA, or aluminum with an overmold such as TPE, TPU, or silicone that is formulated for adhesion and wear resistance. The optimal choice depends on chemical exposure, temperature, hardness (shore A), and required bond strength for the final application.
From experience, I never choose the TPE first; I start with the core material dictated by structural and regulatory needs, then shortlist TPE grades known to bond to that core. A PC+ABS handheld device with alcohol exposure will drive us toward a chemical-resistant TPE, while a tool handle seeing oil and sweat may use a different rubbery blend with higher abrasion resistance. At 6CProto, we typically test at least two durometers, such as 60A and 80A, on early prototypes to confirm the tactile feel under real usage conditions, not just lab data.
Below is a practical reference table we often use with customers when benchmarking material pairings for soft-touch grips:
Typical overmolding material pairings for soft-touch grips
Choosing the right combination early prevents expensive mold rework and avoids the all-too-common issue of grips peeling after a few months in the field.
Why is overmolding ideal for consumer electronics and handheld tools?
Overmolding is ideal for consumer electronics and tools because it delivers integrated soft-touch grips, shock absorption, and sealing without separate components, improving ergonomics, durability, and perceived quality. It also enables distinctive designs and branding through color accents, textures, and localized grip zones that are difficult to achieve with a single material.
In real projects, I see overmolding transform a “cold” plastic or metal shell into a device that feels immediately secure in the hand. For controllers and drills, we design grip islands only where fingers naturally contact, reducing unnecessary material and keeping the product lightweight. Overmolding also lets us create built-in bumpers and edge protection around vulnerable corners of phones or handheld meters.
Another overlooked benefit is acoustic damping: a soft overmold layer can reduce perceived rattling, especially in battery-door areas, which makes devices feel more premium. 6CProto often combines overmolding with subtle surface texturing and micro-embossed logos, turning functional grip zones into brand-identity elements without extra parts or decoration steps.
How should designers plan part geometry for overmolded grips?
Designers should plan overmolded grips with adequate undercuts, ribs, and wrap-around features to mechanically lock the soft material to the core while maintaining uniform wall thickness and proper draft angles. Critical areas must avoid sharp transitions, thin tips, or isolated “islands” of soft material that can trap air or delaminate during use.
From a DFM standpoint, I always ask designers to think in terms of “flow paths” rather than just surfaces. If the overmold has to flow through narrow channels to reach a small grip pad, you risk short shots or high-stress weld lines. Instead, we recommend continuous bands of soft material that can be gated and vented logically, even if it means slight visual changes to the grip pattern.
We also avoid overly sharp textures in high-wear areas; aggressive knurling in TPE can tear over time, especially around edges. At 6CProto, our standard practice is to combine mechanical interlocks (like reverse tapers, through-holes, and “barb” features) with chemical adhesion so that even if surface conditions fluctuate slightly in production, the grip remains secure over the product lifetime.
What design rules help prevent overmolding defects and failures?
Key design rules to prevent overmolding defects include ensuring compatible materials, sufficient mechanical locking, balanced wall thickness, and generous draft on soft surfaces. Avoid thin unsupported fins, sharp corners, and small isolated overmold zones, and place gates and vents to control flow and eliminate trapped air near grip areas.
In production, most failures I see are not “material problems” but design oversights. For example, when a soft grip terminates abruptly on a flat wall, repetitive squeezing can peel the edge like a sticker. We counter this by wrapping the overmold around corners or embedding it into recesses so edges are shielded from peeling forces. Another failure mode is blistering or voids beneath the soft layer, often caused by trapped air due to poor venting; we routinely add micro-vents at the farthest flow ends and along ribs.
Dimensional stack-up is also critical: if the substrate shrinks more than expected, the mold can overpack the TPE, leading to sink marks or “ghosting” visible through transparent walls. 6CProto’s engineers run moldflow simulations where helpful, but we also rely on practical rules such as limiting thick TPE sections and stepping thickness transitions over distance rather than at abrupt edges.
Common overmolding defects and prevention strategies
The Two Interfaces That Decide an Overmold
An overmoulded grip depends on two things that are decided long before the press: whether the second material will actually bond to the first, and whether the geometry lets it fill and cool evenly. The material question is a pairing question — a soft-touch TPE or TPU over a rigid substrate is chosen together, because the bond is partly chemical and partly mechanical, and a pairing that looks sensible on paper can still delaminate at the edge of the grip. The article’s own pairing table is the place to start, and the grade certificate for the elastomer is the document that proves the pairing was honoured.
The geometry question follows the same rules as any thin moulded wall. For many engineering thermoplastics the workable wall range is roughly 1–4 mm, with the practical value set by flow length, part size and gate strategy; vertical faces want 1–2 degrees of draft, and more on deep ribs and bosses, with textured surfaces needing extra draft at roughly 1 degree per 0.025 mm of texture depth. On a grip that is overmoulded, the soft material forms a thin skin over the substrate, so those rules apply to the skin rather than to the assembly: a skin below the range will not fill or will tear at the gate, and one above it pulls the substrate out of shape as it cools. The wall and draft rules are set out in the shop’s design for injection molding checklist.
When a Grip Fails, Correct It in the Right Order
Overmoulding defects — a short shot at the far end of the grip, a weld line running across the thumb pad, warping after the part leaves the tool — are usually read as a material problem when they are a second-shot balance problem. The cost order for corrections is the one the shop sets out for moulding generally: packing and cooling parameters first, because they cost process time only; ejection and handling second; wall balance and ribs third, which is a CAD change that has to happen before the tool is cut; then gate relocation, and only then a cooling-channel redesign, both of which are mould modifications. Working upward from the cheapest layer is what keeps a grip fix affordable. The ordering, and the distinction between uneven shrinkage and a high shrinkage rate, come from the shop’s notes on injection molding warpage and on sink marks.
How can engineers optimize grip ergonomics and user feel with overmolding?
Engineers optimize ergonomics by tuning grip geometry, hardness, and texture to match the user’s hand size, motion, and load paths, then validating these through physical mock-ups and iterative sampling. Overmolding allows varied shore hardness zones, contouring, and micro-textures that deliver comfort, anti-slip performance, and controlled compliance under realistic use.
In practice, I treat grip design like a mechanical spring system. A 50A TPE over a thin wall feels totally different from the same TPE over a thick rib, because the underlying stiffness dominates. At 6CProto, we often adjust rib height or core cutouts under the grip to create calibrated “squeezability,” especially for medical instruments and gaming controllers where fatigue matters. We also vary texture: more aggressive patterns in high-sweat areas, smoother transitions around trigger fingers.
User testing is non-negotiable: we’ll build a small batch of handles with different hardness and textures and let operators or gamers use them for hours, then feed real feedback back into the CAD. That is how you move beyond generic “soft-touch” into grips that genuinely reduce slip and strain.
Where does overmolding fit into 6CProto’s full-service manufacturing workflow?
Overmolding fits into 6CProto’s workflow as an integrated offering alongside CNC machining, conventional molding, 3D printing, and sheet metal, allowing us to take projects from rough prototype to validated overmolded production parts. We support early DFM feedback, tool design, material trials, and high-volume runs while maintaining tight tolerances and inspection.
On complex assemblies, we may machine metal cores or threaded inserts in-house, then use them as overmolding substrates for hybrid parts that combine structural metal with soft-touch grips. For early design validation, we can 3D print the substrate (or even the overmold) to test ergonomics before cutting steel, shortening the decision loop. Once geometry is frozen, our injection molding cells and CMM inspection ensure that the final multi-material parts meet both tactile and dimensional requirements.
By keeping tooling, molding, and metrology under one roof, 6CProto reduces the typical finger-pointing between separate vendors. If a grip is peeling or a dimension drifts, the same team that designed the tool is on the floor to adjust gates, vents, or process parameters instead of shipping parts back and forth across multiple suppliers.
Who should consider overmolding versus traditional single-material molding?
Overmolding is best for manufacturers needing integrated soft-touch grips, impact protection, or sealing in compact designs where separate components add bulk, assembly cost, or failure risk. Designers of handheld electronics, power tools, medical devices, and automotive controls benefit most, especially when user comfort and perceived quality are key differentiators.
For low-cost, low-touch products where feel and aesthetics are secondary, a single-material part with a simple overmolded sleeve or clip-on grip might suffice. However, once you need precise alignment between soft and hard zones—like trigger areas, thumb rests, or IP-rated seals—overmolding becomes the more robust and repeatable option. 6CProto typically recommends overmolding when it allows us to eliminate at least one separate part and one assembly step, creating a clearer ROI.
Startups and smaller teams also gain brand value: a unique, overmolded tactile signature can make a product stand out even in saturated markets. The key is balancing tooling investment against volume; we guide customers through that decision with realistic unit-cost and payback modeling.
Does overmolding reduce cost and lead time compared with multi-part assemblies?
Overmolding can reduce overall cost and lead time by eliminating secondary assembly, fasteners, adhesives, and separate grip components, although it requires more complex tooling and careful process control. At scale, integrated overmolded grips often deliver lower per-unit cost and more consistent quality than assembling separate soft covers or sleeves.
From my experience, the fastest savings come from simplifying the bill of materials: fewer SKUs, fewer suppliers, and fewer tolerance chains. A traditional tool handle with a snap-on rubber sleeve requires two tools, separate sourcing, and an assembly operation that can become a bottleneck. Overmolding moves that complexity into the mold, where cycle time is predictable, and robotics can automatically transfer substrates between cavities.
At 6CProto, we model both scenarios: a dual-part plus assembly approach versus integrated overmolding. In most high-volume consumer projects, the payback on a more advanced overmold tool is achieved within the first 6–18 months, especially when you consider lower field-failure rates and improved customer perception. For very low volume, we may still suggest a hybrid solution, like manual insert overmolding or even bonded grips, to avoid over-investing in tooling.
6CProto Expert Views
“When we tune an overmolded grip, we are not just choosing a soft material; we are designing a controlled interface between human skin, a compliant elastomer, and a rigid backbone. The most successful projects are the ones where designers involve manufacturing early enough that gate locations, rib patterns, and venting are co-designed with the user’s hand in mind, not added afterward as a ‘comfort layer.’”
6CProto’s team has seen overmolding succeed and fail across aerospace, medical, and rugged electronics projects, and our central lesson is simple: treat the overmold as a structural, functional feature—not a cosmetic afterthought. That mindset is what consistently separates durable, premium-feel products from those with peeling or sticky grips a year later.
How can teams get started with overmolding projects effectively?
Teams can start effectively by defining performance requirements, selecting compatible material pairs, and involving an experienced manufacturer in DFM early to design the part and tool for overmolding. Rapid prototypes and small pilot runs help validate ergonomics and bond quality before committing to full-scale production tooling.
The first step I recommend is a simple requirements matrix: grip zones, target hardness, chemical exposures, temperature range, expected life, and cosmetic priorities. With that, 6CProto can propose suitable core and overmold materials, along with basic geometry guidelines. We often suggest a staged approach: 3D-printed ergonomic mock-ups, then soft tooling or limited-cavity steel tools to validate flow and bonding, and finally full multi-cavity production molds once data is solid.
This phased path reduces risk and lets you adjust tactile characteristics based on real feedback, not just data sheets. It also ensures that when you do commit to a full overmolding toolset, you are buying a proven solution—not an expensive experiment.
Conclusion
Overmolding technology gives product teams a powerful way to integrate soft-touch grips, impact protection, and sealing directly into multi-material parts, especially in consumer electronics and tools. By carefully choosing compatible materials, designing robust mechanical interlocks, and optimizing gate and vent placement, you can achieve grips that feel premium in the hand and remain bonded over years of use. In my experience, the most successful projects treat overmolding as a core engineering strategy, not a decorative afterthought, and they bring an experienced partner like 6CProto into the conversation early. If you define your ergonomic goals clearly, validate material combinations through real-world testing, and balance tooling investment against volume, overmolding can significantly improve product quality, reduce assembly complexity, and give your brand a tangible competitive edge every time a customer picks up your product.
FAQ
What is overmolding technology in multi-material molding?
It is a two-shot process: a rigid substrate is moulded first, then a second material is moulded directly onto it, usually through a separate cavity or a rotating tool. The bond between the two is partly chemical adhesion between compatible polymers and partly mechanical interlock where the substrate has been shaped or textured to hold it. That is why the material pairing and the substrate geometry are decided together.
Which materials are best for soft-touch overmolded grips?
A soft elastomer such as a TPE or TPU over a rigid substrate — typically ABS, PC, PA or a glass-filled grade — is the common pairing for grips and handheld products. The substrate provides the structure and the threads or bosses; the elastomer provides friction and feel. What matters is that the specific grade is chosen against the substrate in the pairing table rather than selected on hardness alone.
Why do overmolded grips delaminate or tear?
Three reasons dominate: a pairing that does not adhere, a substrate surface that was not prepared for the bond, and a soft skin that is too thin to fill evenly and tears at the gate. The first is answered by the pairing table and the grade certificate, the second by the moulded surface the substrate is given, and the third by the wall and draft rules applied to the skin rather than to the assembly.
How thick should an overmolded grip be?
It follows the same window as any thin moulded wall: roughly 1–4 mm for many engineering thermoplastics, with the practical value set by the flow length, the part size and the gate. Below the window the skin may not fill or may tear; above it the cooling unevenness starts to move the substrate. Draft of 1–2 degrees on vertical faces, and more on textured or deep features, keeps the grip releasing cleanly.
In what order should an overmolding defect be corrected?
From the cheapest layer upward. Packing and cooling parameters first, because they cost process time only; then ejection and handling; then wall balance and ribs, which is a CAD change that has to happen before the tool is cut; then gate relocation and, last, a cooling-channel redesign, both of which are mould modifications. Reading a short shot or a weld line as a material problem usually means the cheapest corrections were skipped.