

Wet sanding and hand polishing with surface and dimensional inspection
CNC-machined acrylic domes can be finished by progressively wet sanding away tool marks, polishing the surface, and inspecting the part after cleaning and drying. In this case, we used 800-, 1000-, 1500- and 2000-grit sandpaper. For a thin wall, improving clarity also requires control of heat, support pressure and material removal.
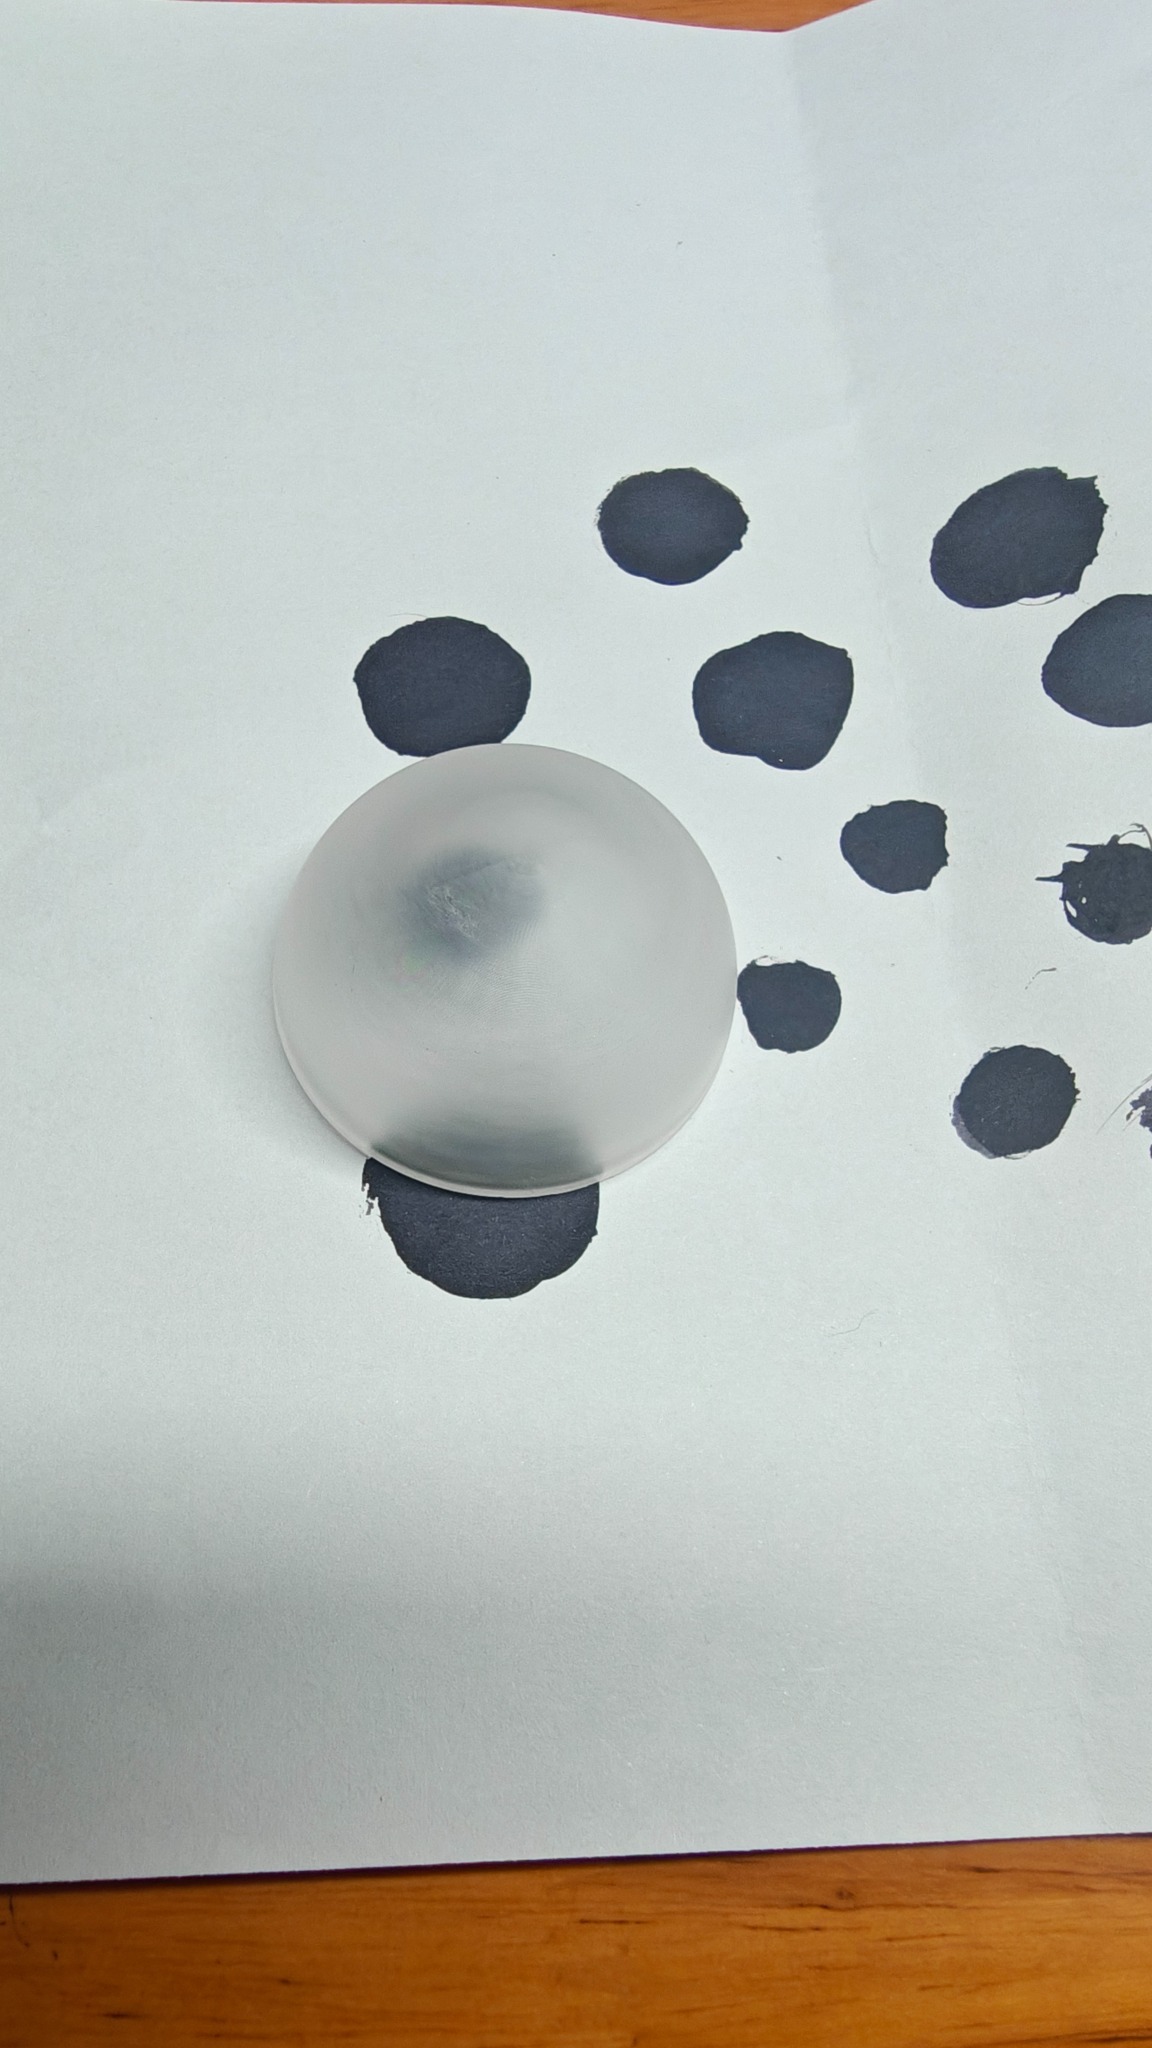
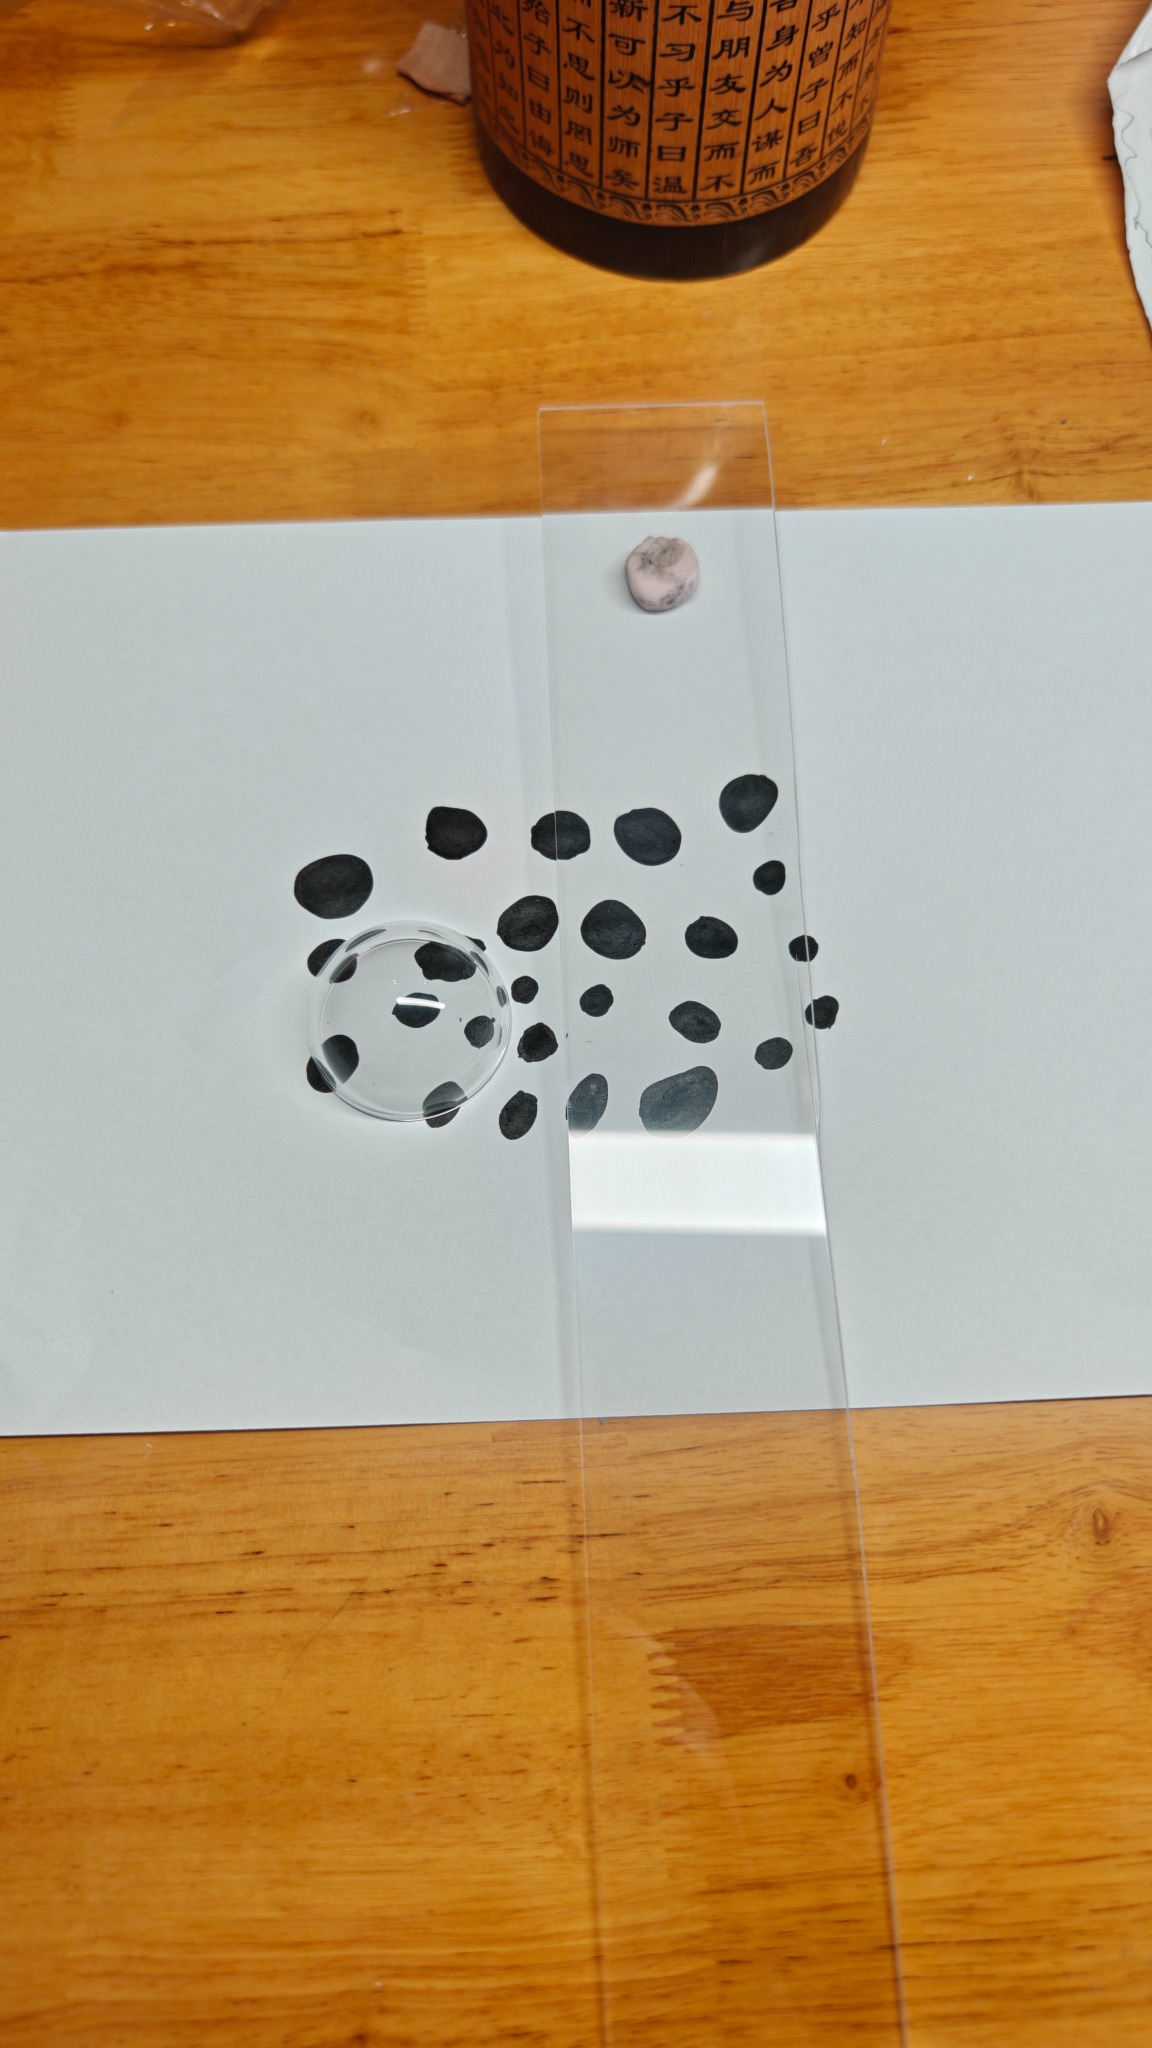
The part in this case is a transparent PMMA dome. The photographs show the improvement in visual clarity after surface finishing. The following sections explain our process and the checks used between stages.
Assess the part before selecting the abrasive
When assessing a CNC-machined acrylic dome, my first question is how much material can be removed without compromising the required wall thickness and profile. I then check which surfaces need polishing, how the part will be supported, and whether the customer needs visual transparency or optical imaging performance with defined acceptance criteria.
We started with 800-grit paper, followed by 1000, 1500 and 2000 grit. This sequence is specific to this part. Shallower tool marks may allow a finer starting grit. If deep marks occur where the wall is already close to its minimum thickness, review the machining or design conditions before continuing.
Record the material grade, abrasive product, polishing compound, support method and inspection conditions so that a successful prototype process can be reproduced.
Why we chose hand polishing for this dome
We chose hand finishing to maintain control over the process. For a thin shell, support and contact pressure matter as much as the abrasive. A rotating polishing wheel can concentrate force over a small area, particularly near the opening edge. Its contact area also changes as it moves over the dome. Unsupported regions may flex, and excessive local polishing can alter the profile.
Machine polishing requires the fixture, wheel diameter, polishing compound, rotational speed, pressure and contact time to be validated together. Rotational speed alone does not define the process because wheel diameter also affects surface speed. Frequent inspection is still necessary to avoid damaging the part.
Hand polishing allows short periods of work in different areas, frequent checks and prompt stopping once a defect has been removed. The operator can adjust pressure and contact time through tactile feedback. For this curved part, the customer required a clear finish, and maintaining the curvature during machine polishing would have required carefully controlled tooling and support.
Wet sand progressively from 800 to 2000 grit
Use waterproof abrasive paper and clean water. Water helps remove debris, reduce abrasive clogging and limit frictional heat buildup. Apply light pressure and keep the abrasive moving. Clean the part and all contact surfaces before changing grit.
We judge completion by the marks remaining after cleaning, rather than by elapsed sanding time. A uniform frosted appearance is useful, but it does not prove that all CNC tool marks have been removed. Inspect the crown, sidewalls and opening edge separately.
| Stage | Purpose | Check before proceeding |
|---|---|---|
| 800-grit wet sanding | Remove CNC tool marks | Original tool marks removed within the available material allowance |
| 1000-grit wet sanding | Refine 800-grit scratches | No obvious coarse scratches from the previous stage |
| 1500-grit wet sanding | Further refine the surface | Fine, consistent sanding marks |
| 2000-grit wet sanding | Prepare for cloth polishing | No isolated deep scratches or coarse sanding marks |
After each stage, clean the surface and gently blot it dry before inspection. Air can be used to remove remaining water. A water film may conceal scratches. Avoid repeatedly sanding one spot to chase a defect. Follow the curvature with broad strokes along the dome’s main diameter, while checking the remaining allowance and surrounding profile.
Initial polishing and final mirror polishing
After fine sanding, remove all debris and sanding slurry before polishing. For the initial polish in this case, we applied Brasso metal polish with a lint-free cloth, then cleaned and dried the surface for inspection. We then changed to a clean cloth and used a 3M mirror-finish polishing compound. The initial polish addressed fine sanding marks; the final polish improved residual haze and light polishing marks.
These brands identify the consumables used in this case. Their use here does not establish suitability for every transparent material. For another project, confirm the compatibility of the specific product and test it on a sample of the same material. Inspect the sample after polishing, cleaning and an appropriate holding period. Using water during sanding does not mean that every subsequent polishing compound can be diluted with water.
Keep the cloths for initial and final polishing separate. If a distinct scratch remains, return to the appropriate sanding stage rather than applying more pressure during final polishing. Stop when the agreed surface condition has been achieved. There is no fixed number of polishing passes.
Identify the defect before extending polishing time
The checks below help investigate defects; they do not mean that each listed cause has been confirmed on this part. Local haze, isolated scratches and deformation require different responses.
| Observation | Check before rework | Action |
|---|---|---|
| Persistent deep scratches | Previous sanding marks and remaining material allowance | Return to a suitable sanding grit if the allowance permits |
| New isolated scratches | Dirty cloths, coarse abrasive contamination or dirty supports | Clean contact surfaces and replace contaminated consumables |
| Local haze after cleaning | Insufficient fine sanding, residue or surface damage | Identify the cause before deciding whether to polish again |
| Waviness or a thinned edge | Local material removal, applied pressure and support | Stop and measure; polishing cannot replace removed material |
Inspect clarity and geometry separately
Inspect the part in a clean, dry condition. Use oblique lighting to reveal scratches, sanding marks and waviness, and transmitted light to look for bubble-like defects and fine cracks. Rotate the dome and inspect its inner and outer surfaces, crown and edges. Water films and polishing residue may temporarily hide defects.
The black pattern in the photographs provides a qualitative indication of clarity. The curved dome itself refracts light, so distortion of a background pattern should not automatically be classified as a polishing defect. These photographs do not establish numerical values for light transmission, haze, surface roughness or optical accuracy.
Define acceptance conditions before finishing
For appearance prototypes, agree on lighting, viewing distance, viewing angles and allowable defects in advance. Separately verify the wall thickness, profile and mating dimensions specified on the drawing. For an imaging dome, define the optical tests and acceptance limits before selecting the finishing process.
Frequently asked questions about acrylic polishing
Does every CNC acrylic part need to start at 800 grit?
No. Select the finest starting abrasive that can remove the actual tool marks within the permitted material allowance. The 800-to-2000-grit sequence was used for this particular dome; it is not a universal requirement for PMMA parts.
Why is acrylic still cloudy after sanding to 2000 grit?
Fine sanding still leaves abrasive marks. A uniformly fine surface may be ready for polishing, while isolated coarse scratches require further sanding. Make this assessment only after cleaning and drying the surface.
Does a mirror finish mean optical grade quality?
No. Gloss and visual clarity describe appearance. Optical performance requires separately defined tests and acceptance limits based on the intended application.
Information needed for an acrylic machining review
For a transparent acrylic cover or prototype, provide the 3D model and drawing, material requirements, minimum wall thickness, critical dimensions, surfaces requiring transparency and acceptance conditions. Also state whether the part has an imaging or sealing function. This information helps us assess the machining allowance, tool access, support and finishing requirements together.
To discuss a project, submit your requirements through 6CProto’s CNC machining services page.