

A machined pocket arrives with a note from the shop: “Internal corners cut at R1.5 as requested — please confirm.” Your drawing asked for a sharp corner, and the shop improvised a radius because a round cutter cannot cut a square corner. If that radius sits where a mating part must fit, the assembly fails; if it sits on a cosmetic face, nobody cares. The difference between those two outcomes is a few words on the drawing, written before quoting instead of after inspection. Internal corner radii are the most common silent design decision in CNC parts, and this guide explains how to make the decision explicit.
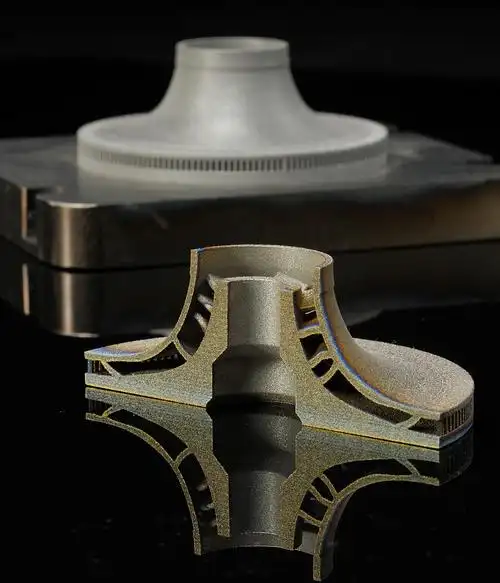
Why can’t a CNC cutter leave a sharp internal corner?
A rotating end mill is a cylinder, and where two machined walls meet, the tool leaves a fillet close to its own radius. To produce a smaller corner radius, the shop must switch to a smaller cutter, which is weaker, deflects more, and needs slower passes and shallower engagements. The corner radius on a drawing is therefore a tool-diameter decision in disguise, and it should be written with that trade-off visible.
The practical consequence is a cost ladder: a large radius allows a stiff tool and fast roughing; a small radius forces smaller tools, more passes, and higher risk of chatter or breakage; a radius near the limit of tool reach may require a specialty tool or a second operation such as EDM. Designers who write “R0.5 all internal corners” on a deep pocket are paying for the worst case across the whole part even when only one corner needs it.
Corner radius and pocket depth are linked by tool reach
The radius you can hold depends on how deep the pocket is relative to the tool diameter. A widely used shop rule is that a cutter can safely work pockets around three times its diameter deep, which translates into a corner radius of roughly one third of the pocket depth. The rule is a screening device, not a law: shallow pockets can hold smaller radii, deep pockets need larger radii or reach-limited tooling, and holder and machine stiffness shift the practical limit either way.
Use the ratio before quoting. A 3 mm radius at the bottom of a 30 mm deep pocket asks the shop to reach a 6 mm tool into a five-diameter-deep feature — possible with the right holder, but slow and risky. If the drawing instead calls R2 on the functional wall and leaves the bottom corner general, the shop can choose the tool and sequence that actually works. When a deep pocket genuinely needs a small radius, expect a conversation about EDM, a stepped tool, or a longer cycle.
Relief slots make square corners without square tools
Use a relief feature: cut a small slot or recess in one wall at the corner so the functional edge stays square while the visible corner carries a radius. The concept is the same as a dog-bone or corner-relief feature in sheet metal, and it works because most assemblies only need one side of the corner to be clean. Identify which corner matters — usually the one that receives the mating square edge — and put the relief on the other side.
Reliefs have two costs of their own: they add a feature that must be dimensioned, and they create a stress concentration if placed on a loaded edge. For structural parts, a radius on the loaded corner with a matching radius on the mating part is often the stronger answer than a relief. Choose the relief when the requirement is geometric fit, and choose radii on both parts when the requirement is mechanical strength.
The drawing separates functional radii from general corners
Call out the radius only where it is functionally required, and add a general note that unspecified internal corners should use the largest practical radius. That combination lets the shop optimize the noncritical corners while holding the critical ones. Where the radius limits a mating fit, dimension it as a maximum radius on the receiving feature, because the mating square edge is what must clear.
If a corner is cosmetic, write a finish note rather than a tight radius, because a cosmetic corner does not need a small tool. If the part is assembled, include the mating geometry in the notes; shops routinely hold a tighter radius than the drawing needs when they do not know what fits inside the pocket. The clearest callout is the one that states function: “R2 max to clear mating plate; other internal corners general.”
Radius choices change quotes through tool size and risk
Radius choices change price through tool size, operation count, and risk. A part whose corners allow one large tool is faster and cheaper than an identical part that forces a small tool everywhere. Mixed radii across similar features can add tool changes; a radius at the limit of reach raises the chance of deflection, chatter, and rework; and an unnecessarily tight radius on a deep wall can push a milling job into an EDM or specialty-tool conversation.
The cheapest drawing is usually the one that lets the shop use the largest tool the geometry allows, with tight radii reserved for the corners that genuinely need them. If you are unsure what radius your part can accept, ask before the CAD is final. Changing a radius in the model costs minutes; changing a toolpath after quoting costs a cycle-time increase that the customer pays for. For a full review of reach, tooling, and feature limits, the CNC machining team can check the pocket depths against the corner callouts before you lock the release.
Corner radius decisions also affect inspection. A radius that is specified but not measured is a requirement in name only; machinists will cut to the tool they chose, and the inspector cannot verify the radius without the right equipment. Radius gauges and optical comparators cover many features, but a small radius at the bottom of a deep pocket may be practically unmeasurable without a specialty probe, which is another reason to question very tight deep-pocket radii during design review. If the radius is functional, put it on the inspection plan and confirm the measurement method with the shop before release; if it is not functional, leave it under the general note. Teams that skip this step discover the issue when the first-article report arrives without the radius dimension and the buyer has to decide whether to accept an unverified feature. The cleaner path is to decide, at design review, which corners matter, which are general, and how each will be verified, and to write those decisions into the drawing notes so the shop and the inspector are checking the same list.
Tolerance stacking at the corner is easy to overlook when the radius is drawn as a local callout. If a mating part must fit inside a pocket, the effective clearance depends on the corner radius on both parts, the positional tolerance of both features, and the size tolerance of the pocket walls — a radius that looks fine in isolation can combine with the position tolerance to close the fit at the worst-case corner. Review corners as part of the assembly tolerance analysis, not as isolated radii, and dimension the worst-case corner explicitly when the fit is tight. When several identical pockets exist, decide whether they all need the same radius or whether only the functional ones do; a drawing that tightens every pocket for one assembly condition spends cycle time on features that never matter.
Frequently asked questions
Is a smaller corner radius always more expensive?
Not always, but usually. The cost appears when the small radius forces a smaller tool into a deep or long feature, which slows the cut and raises tool wear. On shallow features the difference can be minor. Price the specific depth and radius rather than assuming a rule; a 1 mm radius in a 3 mm deep pocket is far cheaper than the same radius in a 30 mm deep one.
Can EDM produce a sharp internal corner?
EDM leaves a radius too, because the electrode has its own geometry, but the radius can be much smaller than a milling cutter can reach at the same depth. Wire EDM cuts a sharp corner only if the wire path can approach it, and ram EDM requires an electrode shaped to the feature. Treat EDM as an option for small-radius deep corners, and confirm the electrode cost and finish before specifying it.
What radius should a mating square part use?
Give the pocket corner a radius equal to or slightly larger than the mating part’s corner radius, or design the mating part with a matching radius. If the mating part is truly square, add the relief feature described above. The rule to avoid is guessing: dimension the fit condition, not the aesthetic, and the assembly will close without interference.
Conclusion
Internal corner radii are a tooling decision that belongs in the design phase. Specify radii on functional corners, leave a general note for the rest, and use relief features when a true square corner is required. The depth-to-radius ratio is the fastest check for manufacturability, and the quote will reflect the difference between a drawing that was designed around a cutter and one that was not.
If you are finalizing a machined part and want the corner callouts checked against tool reach and cost, send the pocket depths and mating geometry to the 6CProto CNC team before release. A quick radius review routinely shortens cycle time without changing the function of the part.